Tongue Drum Scale Guide for Finding Your Sound

Tongue Drum Scale Guide for Finding Your Sound

Tongue Drum Scale Guide: Find Your Perfect Sound

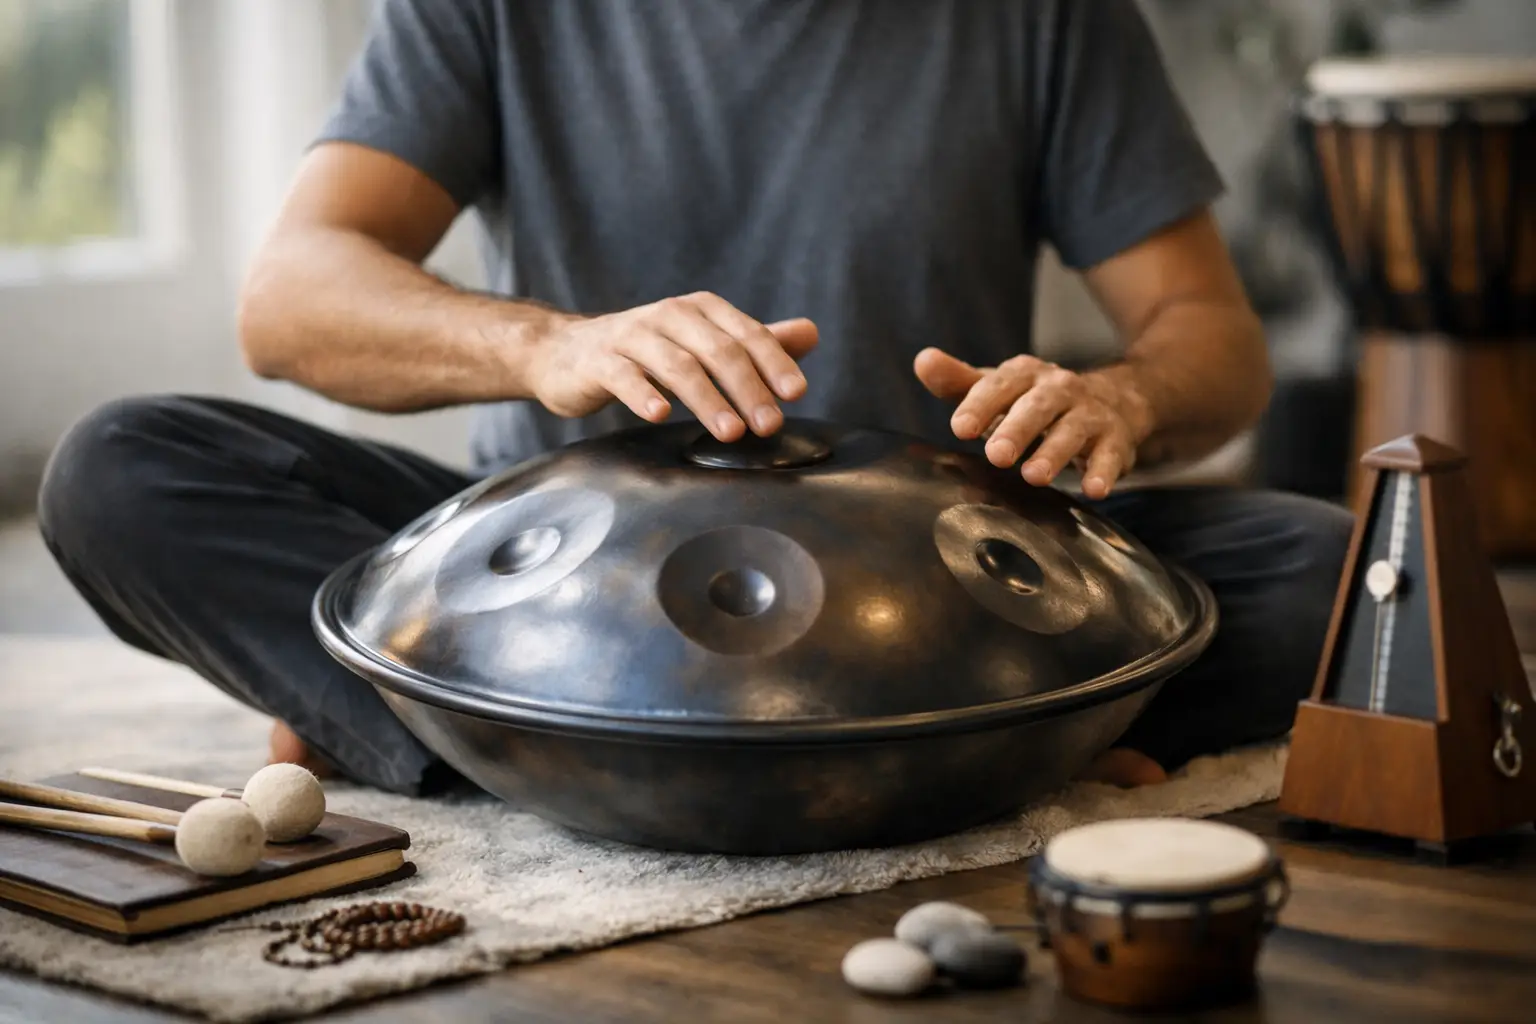
A tongue drum can feel wonderfully forgiving from the first tap, but its scale quietly shapes every phrase you create. This tongue drum scale guide will help you hear beyond labels and choose an instrument whose voice suits your own rhythms – whether that means gentle solo playing on the verandah, a yoga class, a sound-based wellbeing session, or a melodic layer in live performance.

Unlike a piano, where every key is available at once, a tongue drum presents a carefully selected family of notes. That limitation is part of its charm. The notes are designed to sit together, so even a player with no music theory can make music that feels settled, expressive and complete.

What a tongue drum scale actually means

A scale is the set of notes tuned into your tongue drum. Each tongue, or cut-out section of the steel, produces one note when struck with a mallet or fingertips. The relationship between those notes determines the instrument’s emotional colour, its melodic possibilities and how easily it blends with other instruments.

You may see a tongue drum described by its key and scale name, such as C major, A minor, D Kurd or C Akebono. The letter tells you the tonal centre, often called the root note. The scale name tells you which intervals have been chosen around it. Two drums with the same root note can feel entirely different if they use different scales.

This is why choosing a scale is not simply a technical decision. It is a decision about the musical spaces you want to inhabit. Some scales lean bright and open. Others carry a more reflective, earthy or mysterious quality. Neither is better. The right choice depends on what makes you want to sit down and play.

Tongue drum scale guide: the main scale families

Major scales for brightness and familiar melody

Major scales tend to sound clear, uplifting and recognisable to Western ears. A C major tongue drum, for example, can suit simple songs, playful melodic exploration and group music-making. If you enjoy creating tunes that feel sunny, resolved and easy to share, a major scale can be a natural starting point.

The trade-off is that major scales can sound more musically direct than atmospheric. That is ideal for some players, particularly educators, families and performers who want an immediately approachable sound. For a player seeking a more spacious, meditative mood, a minor or modal scale may feel more compelling.

Minor scales for depth and reflection

Minor scales are often chosen for their warm, contemplative character. They can hold sadness, tenderness and stillness without becoming heavy. A minor tongue drum can be especially inviting for personal practice, slow improvisation and moments when you want to follow feeling rather than a familiar song structure.

Minor does not mean gloomy. On a well-tuned steel tongue drum, the sustain and soft attack can make minor notes feel deeply calming. They leave room for pauses, repetition and gentle rhythmic patterns, which is one reason they are popular in meditation and wellbeing settings.

Pentatonic scales for effortless flow

Pentatonic means five-note. These scales remove some of the notes that can create tension, leaving a compact palette that is exceptionally easy to improvise with. A pentatonic tongue drum is a lovely option for beginners, children, and anyone who wants to play without second-guessing each note.

Because the notes work so naturally together, pentatonic scales invite relaxed exploration. You can repeat a small motif, move around the drum at random, or build a steady pulse underneath a melody. Their simplicity is not a limitation. Skilled players often appreciate the clarity and freedom that fewer notes can bring.

Modal and world-inspired scales for atmosphere

Scales such as Kurd, Celtic, Akebono, Hijaz and other modal variations offer colours that sit outside straightforward major and minor territory. They are often associated with spacious, ancient, Eastern-inspired or cinematic moods, though every player will hear and use them differently.

Kurd scales are widely loved in the handpan and tongue drum world for their emotional range. They can feel gentle and introspective, yet still support rhythmic movement and expressive melodies. Akebono scales often have a delicate, suspended quality, while scales containing more dramatic intervals can create a stronger sense of mystery or tension.

These options can be particularly rewarding if you are drawn to music for movement, sound journeys or creative performance. They may be less suited to playing well-known songs exactly as written, but they offer a distinct voice that does not need to sound like anything else.

Start with the feeling, then consider the key

Players sometimes get caught up in finding the objectively best key. There is no such key. The key matters most when you intend to play alongside other instruments, recorded music or singers. If you are playing alone, the scale character and pitch range will usually matter more than whether the root is C, D, F or A.

Lower-pitched drums often sound rounder and more grounding. Their notes can bloom with a slower, fuller resonance, which many players enjoy for quiet home practice, yoga and restorative settings. Higher-pitched drums can feel brighter, lighter and more agile. They may carry well in a group and can be easier to hear in a lively room.

If you already play guitar, flute, handpan or another melodic instrument, choosing a compatible key can make collaboration more comfortable. A tongue drum in D minor, for instance, may sit beautifully beside instruments and songs in related keys. But compatibility is more than matching the letter on the label. Scale notes, register, volume and your playing approach all influence whether two instruments truly blend.

How many notes do you need?

Tongue drums are available with different note counts, and more notes do not automatically mean a better instrument. An eight-note drum is often beautifully focused. Its layout is easy to learn, its musical choices are clear, and it encourages the player to make the most of rhythm, touch and silence.

A drum with 11, 13 or more notes gives you a wider melodic range and more opportunities to create contrasting sections in a piece. This can be valuable for experienced musicians, performers and players who want to write more developed compositions. It can also take a little longer to become familiar with the layout.

For a first instrument, a smaller note set is often a gift rather than a compromise. You can develop confidence quickly and hear how rhythm changes the same few notes. If you know you are a melody-focused player who enjoys learning tunes, a larger range may be worth considering from the outset.

Match the scale to where you will play

A scale that feels perfect in a quiet bedroom may serve a different purpose in a group session or on stage. Think about the moments you want your tongue drum to support.

For meditation, breathwork or gentle sound-based wellbeing work, many players prefer scales with a calm, cohesive character and a lower or mid-range voice. Pentatonic, minor and soft modal scales are common choices because they make it easy to sustain a peaceful musical thread. The instrument can support a settling atmosphere, but it does not need to carry the entire session. Space is part of the sound.

For singing, songwriting or playing with friends, a major or familiar minor scale may be more practical. These scales can make it easier to locate chords and melodies that others recognise. If you want to use your tongue drum as a melodic percussion layer beside a handpan, choose a scale that complements rather than duplicates the handpan’s note set. A little contrast can create a richer conversation between the instruments.

For solo creativity, trust the sounds that make you pause. Listen to recordings where possible, preferably with headphones as well as through your mobile speaker. Notice whether you are drawn to bright lift, dark warmth, floating ambiguity or a rhythmic, earthy pulse. Your response is useful information.

A simple way to choose without overthinking it

Begin by narrowing your choice to two or three sound worlds. Perhaps you want an uplifting major scale, a restful minor scale, or a more unusual modal voice. From there, consider pitch, note count and whether you will regularly play with other musicians.

Do not choose a scale solely because it is described as healing, beginner-friendly or popular. Those terms can point you in a helpful direction, but they cannot replace your own ears. A tongue drum becomes personal through repetition: the patterns you return to, the tempos that calm you, and the notes that seem to answer back when you need a moment of connection.

At Handpans Australia, the aim is not to make every player sound the same. It is to help you find an instrument that invites you back, day after day. Choose the scale that makes your hands curious. The rest of your musical language can grow from there.
Native Flute Key Selection for Every Player

Native Flute Key Selection for Every Player

Native Flute Key Selection Guide for Every Player

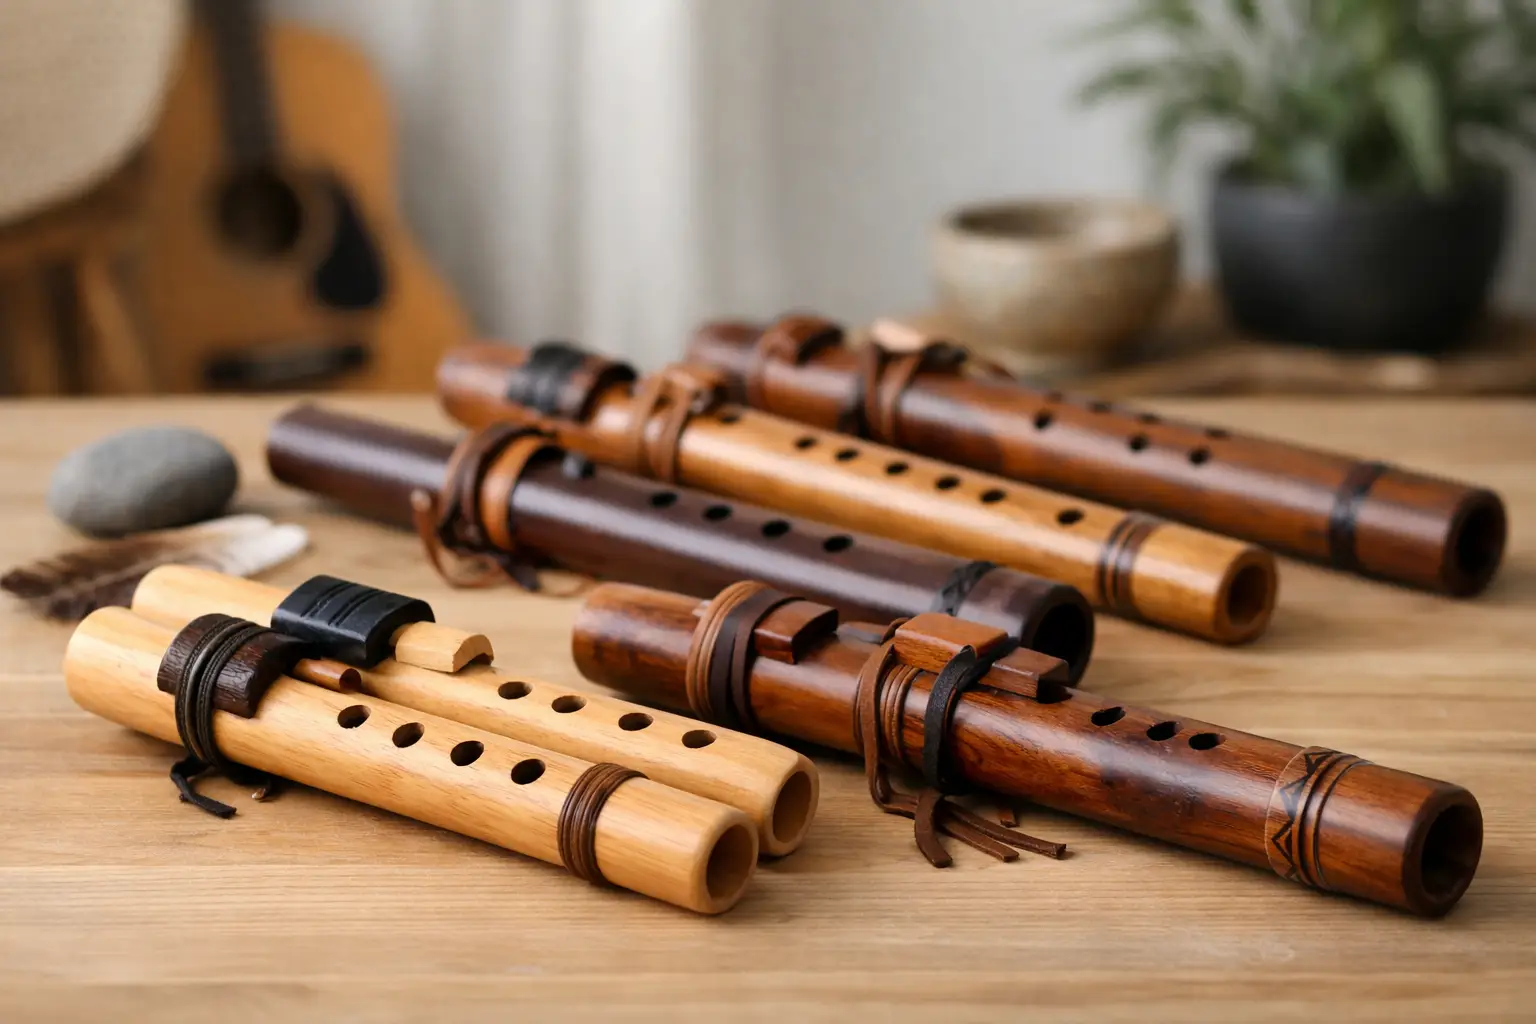
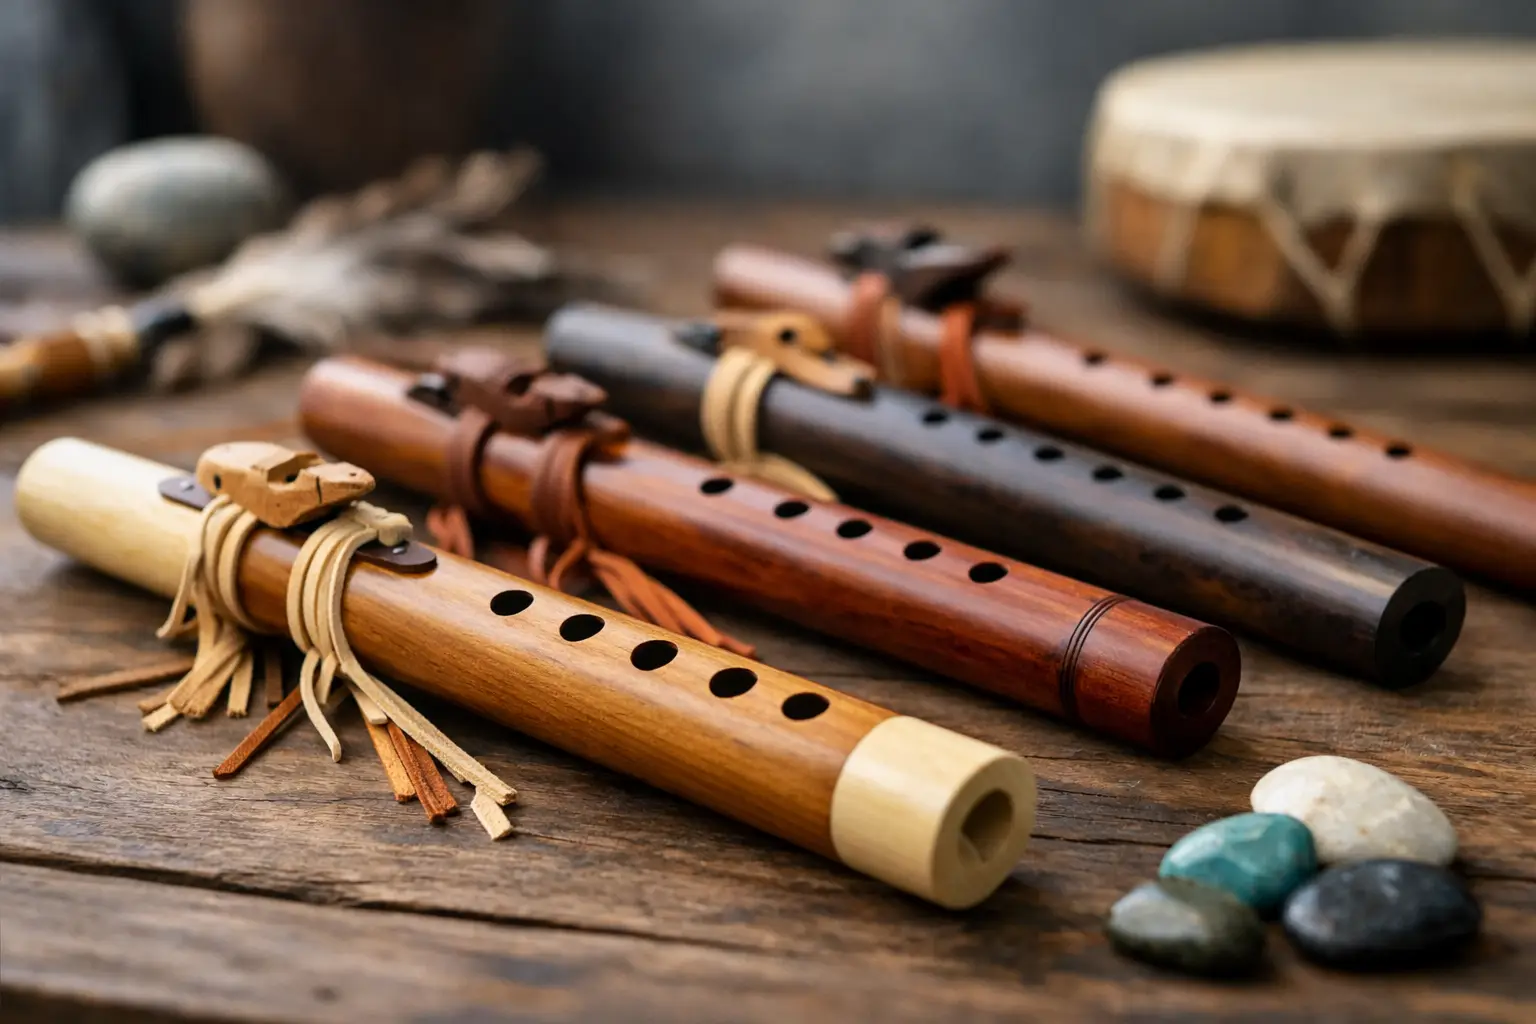
A Native American flute can feel like a quiet companion from the first breath, but the key shapes that relationship. Native flute key selection is not about finding one objectively ‘best’ note. It is about choosing the voice, size and musical range that feel natural in your hands and speak to the kind of moments you want to create.

A low flute may offer an earthy, spacious tone that settles a room. A higher flute can carry more easily, add brightness to an ensemble and feel wonderfully nimble under the fingers. Both can be deeply expressive. The right choice depends on your breath, your body, your musical ear and the sounds you hope to play alongside.

Start with the feeling you want to create

Before comparing letter names, picture where your flute will live. Is it for a few reflective minutes on the verandah at dusk? Gentle melodies in yoga or meditation sessions? Improvising with a handpan, guitar or voice? Or perhaps performing where the instrument needs to be heard clearly beyond your own space?

Lower keys such as A, G and F# are often chosen for their warm, rounded character. Their notes have a grounded quality, with more air and depth in the sound. They suit slow phrases, spacious pauses and melodies that feel close to the earth. Many players are drawn to these keys for personal practice, sound-based wellbeing and accompaniment that does not feel hurried.

Mid-range keys, particularly F, E and D, are a beautiful meeting place for many players. They retain enough warmth for reflective music while being a little easier to carry, hold and play for longer periods. D is widely loved as a versatile all-round key, especially for players who want one flute that can move between private practice, casual jam sessions and simple recording.

Higher keys such as C, B and A have a clearer, lighter voice. They respond quickly, travel well and can sit above lower instruments without disappearing into the mix. A high flute can be a lovely choice for melodic improvisation, outdoor playing, or anyone whose hands find larger flutes uncomfortable.

There is no hierarchy here. A high C is not a beginner’s compromise, and a low A is not automatically more advanced. Each key creates a different emotional landscape.

Native flute key selection begins with comfort

The pitch of a flute affects its physical dimensions. As a general rule, lower-pitched flutes are longer, with wider finger-hole spacing and often a larger bore. Higher flutes are shorter, lighter and usually easier for smaller hands to reach around.

That does not mean every player with smaller hands must choose a high flute. Makers use thoughtful hole placement and ergonomic designs, and hand flexibility differs from person to person. Still, comfort deserves more attention than it often gets. A flute that sounds magnificent but strains your fingers can quietly discourage practice.

If you are purchasing your first instrument without trying it in person, a mid-range flute is often a sensible starting point. D, E or F tend to provide a rewarding balance of mellow tone, manageable size and broad musical usefulness. If you know you are especially drawn to a deep, low voice, consider whether a larger instrument will be comfortable during a relaxed 15-minute playing session, not only for a quick test.

Breath matters too. Larger, lower flutes may ask for a fuller, steadier airstream. This is not the same as needing force. Native American flutes respond best to calm, supported breath rather than pressure. A higher flute generally speaks with less air, which can make it feel immediately accessible for a new player. Yet some beginners naturally enjoy the slow, grounding breath of a lower instrument. Your body will often tell you more than theory can.

Do not confuse the key with the scale

A flute’s key tells you its tonal home – for example, D or F#. Its scale tells you which notes are most naturally available and how the melodies tend to feel. Many Native American-style flutes use a minor pentatonic tuning, a five-note framework that makes it easy to create musical phrases without needing years of formal theory.

This is part of their quiet magic. You can explore, pause, repeat a motif or follow your ear, and the flute gives you a strong chance of landing somewhere harmonious. Depending on the maker and tuning, cross-fingering and breath control can reveal further notes and colours.

When comparing instruments, listen for the whole personality rather than judging by the key name alone. Two flutes in D can have distinct voices due to their timber, bore design, wall thickness, tuning approach and craftsmanship. One may be smoky and intimate; another may be bright and open. The key is a useful starting point, not the entire story.

Choosing a key to play with other instruments

If you want your flute to join a handpan, tongue drum, guitar or other melodic instrument, compatibility becomes a practical part of native flute key selection. The simplest option is to choose instruments with the same root note or closely related scales.

For example, a D flute can pair beautifully with a handpan or tongue drum centred around D, particularly when their scales share similar minor or pentatonic colours. An F# flute may feel at home with an F#-centred handpan. Even then, listen rather than relying only on labels. Scales can contain different notes, and a combination that looks compatible on paper may feel busy or unresolved when played together.

A little contrast can be wonderful. A low flute beneath a brighter tongue drum can create a conversation between earth and light. The trade-off is that playing together requires more listening. Start by holding long notes on the flute while the other instrument establishes a gentle pulse. Notice which notes rest comfortably and which create tension. Neither is automatically wrong – tension can be expressive – but it should feel intentional.

For sound sessions, keep the flute’s role in mind. A lower key may blend into a handpan’s resonance so softly that it becomes more texture than melody. A higher key will often rise above the sustain and give participants a clear melodic thread to follow. Neither approach is better. It depends on whether you want the flute to cradle the soundscape or lead it.

One flute or a small family of keys?

Many players eventually collect more than one flute because each key invites a different kind of music. That does not need to be your plan on day one. One well-chosen flute can offer years of discovery.

If you are beginning with a single instrument, choose for the music you will actually make most often. Select a mid-range D, E or F for broad versatility. Choose low A, G or F# if you already know that deep, meditative resonance is what moves you. Choose C or another higher key if portability, easy reach and a clear melodic voice matter most.

Later, a complementary second flute can expand your palette. A player who begins with a low G may enjoy adding a higher C or D for contrast. Someone with a bright high flute may eventually want a lower key for slower, more spacious work. Think of each new key as a new shade of the same familiar voice.

Listen with your own ear, not someone else’s

Audio recordings are helpful, but they cannot fully convey how a flute feels against your fingers or how its resonance meets your chest in a quiet room. If you can hear examples through good headphones, pay attention to the notes that make you instinctively slow down, breathe more deeply or want to answer with a phrase of your own.

Avoid choosing only because a certain key is popular or because a performer makes it sound extraordinary. Their hands, breath, room acoustics and musical purpose may be very different from yours. A flute becomes personal through the time you spend with it, not through its specifications alone.

It is also worth approaching the instrument with respect for the living Indigenous traditions connected with Native American flutes. Learn from makers and players who acknowledge that heritage, and let your own practice be guided by care, listening and genuine appreciation.

At Handpans Australia, we see the best instrument choices begin with a simple question: what kind of sound do you want beside you when words are not needed? Follow that answer. The right key is the one that keeps calling you back for one more breath, one more note and one more unplanned melody.

Handpan Rhythm Exercises for a Steadier Flow

Handpan Rhythm Exercises for a Steadier Flow

Handpan Rhythm Exercises for a Steadier Flow

A handpan can make a simple pattern feel spacious and alive, but the quality that holds those beautiful notes together is rhythm. The most useful handpan rhythm exercises are not about playing faster or showing off complicated beats. They teach your hands to return to a steady pulse, so melody, resonance and silence all have somewhere to land.

For a beginner, rhythm practice can turn random tapping into music you can trust. For an experienced player, it can bring greater control to improvisation, performance and sound-based sessions. Start gently. A handpan responds best when your body is relaxed, your touch is clear and you give each note enough space to bloom.

Start with pulse, not patterns

Before adding a scale, establish the beat beneath it. Place your handpan securely on your lap or stand, sit comfortably and choose a slow tempo that feels almost too easy. Around 60 beats per minute is a lovely place to begin, although you do not need a metronome straight away.

Tap the ding, the central note, once every second. Count aloud: “one, two, three, four”. Keep the volume and tone as even as you can. This may sound basic, yet it reveals a great deal. If one strike rushes, drags or sounds noticeably harder than the next, simply notice it and continue. Rhythm grows through returning, not through judging yourself.

After a minute, let the ding become beats one and three, then play a nearby tone field on beats two and four. You now have the beginning of a grounding four-beat groove. Keep it unhurried for several minutes. The aim is to feel the pulse in your body rather than chase it with your thoughts.

Exercise: The four-step walk

Imagine walking along a quiet beach, with each footfall evenly spaced. Play ding, tone, ding, tone, counting to four as you go. Once it feels settled, change the second and fourth notes while leaving the ding in place. Your central pulse becomes an anchor, while the changing notes create colour around it.

This exercise is especially helpful for players who love improvising but find their phrases becoming scattered. There is no need to stop being expressive. Give your expression a dependable home.

Handpan rhythm exercises for both hands

A common early challenge is that one hand naturally leads while the other feels hesitant or heavy. Rather than forcing speed, use short alternating exercises that make both hands equally familiar with the instrument.

Choose one comfortable note on the left and one on the right. Play left, right, left, right, with a small and relaxed motion. Let the fingers rebound after contact. Avoid pressing into the steel or striking as though you need to pull sound from it. A well-made handpan has resonance waiting in the shell; your job is to invite it out.

When the alternation is even, add a pause after every four notes: left, right, left, right, rest. The rest matters. It helps you hear whether the final note rings cleanly and prevents the pattern becoming a blur.

Next, shift the accent without changing the tempo. Play eight alternating notes, but make only the first one slightly stronger. Repeat, then place the gentle accent on the third note. Accents create the feeling of a groove even when the notes themselves remain simple. They are also a kinder way to build musical variation than adding more and more notes.

If your non-dominant hand struggles, practise it alone for a minute on a single tone field, then return to alternation. A quieter, more controlled strike is better than a loud one that interrupts the pulse.

Learn to divide the beat

Once a steady four-beat pulse feels natural, you can explore subdivisions. These are the smaller spaces inside each beat, and they are where a handpan rhythm begins to dance.

Start by tapping the ding on each counted beat: one, two, three, four. Then play two even notes between each count, using a side tone: “one-and, two-and, three-and, four-and”. Do not speed up the entire exercise. The main pulse must stay calm while your hands fill the spaces around it.

Try this for four bars, then return to single beats for four bars. Moving between simple and divided time is a powerful listening practice. It teaches you that faster notes are not automatically more energetic. Sometimes a return to open space is what makes the rhythm breathe.

Exercise: Three notes against four

For a softer, rolling feel, count four steady beats with your voice or foot. Over those four beats, play three evenly spaced notes on a chosen tone field. Repeat the three-note phrase until it meets the beginning again.

At first, it may feel as though the notes are floating away from the beat. That is normal. This is not an exercise to force into place quickly. Listen for the point where the three-note cycle and the four-beat pulse reunite. It creates gentle tension and release, which can be beautiful in reflective playing, yoga classes or a slow live set.

Use this sparingly in free improvisation. If every phrase crosses the pulse, listeners can lose their sense of grounding. A simple groove followed by a brief rhythmic lift usually has more impact.

Build a groove with low, middle and high tones

Most handpans offer a natural sense of range: the ding provides a low centre, nearby notes offer warmth and higher tone fields bring brightness. You can shape a complete rhythm by assigning each area a role.

Keep the ding as your grounding note. Use one or two middle tones for the main response, then reserve a high note for an occasional lift at the end of a phrase. Play a four-beat cycle with ding on beat one, a middle tone on beat two, ding on beat three and another middle tone on beat four. After four repetitions, add a high note just before returning to beat one.

The high note should feel like a breath in, not a sudden interruption. If it dominates the sound, soften your touch or use it less often. On handpan, restraint often sounds more confident than constant activity.

This approach also makes improvisation less intimidating. Rather than searching for the next “right” note, you know the role each register can play. Your hands are free to respond to the moment while the rhythm remains clear.

Practise silence as part of the beat

The most resonant handpan players are comfortable leaving space. Silence is not an empty gap between ideas; it is part of the phrase, allowing the steel to shimmer and the listener to absorb what has just been played.

Create a simple two-bar rhythm. In the first bar, play four measured notes. In the second, play only the ding on beat one, then let the remaining beats rest. Repeat this cycle until the silence feels intentional rather than awkward.

You can also use a soft hand touch to gently mute a ringing tone. This is worth exploring carefully, as too much damping can make the instrument sound clipped. The choice depends on the mood you want: long resonance suits meditative soundscapes, while shorter notes can create a more percussive, rhythmic feel.

A 10-minute daily rhythm ritual

Consistency will take you further than an occasional long session. A focused 10 minutes is enough to build a genuine relationship with pulse. Spend the first two minutes on steady ding strikes, then two minutes alternating hands. Use the next three minutes to practise “one-and, two-and” subdivisions, followed by two minutes creating a low-middle-high groove. Give the final minute to a slow phrase with deliberate silence.

A metronome can be useful, particularly if you are preparing to play with other musicians. It offers honest feedback and helps separate a steady pulse from a merely familiar one. Yet it is not essential for every practice. At times, playing without one lets you listen more deeply to your breath, the decay of the notes and the emotional pace of your own music.

Record a short practice occasionally on your mobile. Do not listen only for mistakes. Notice where your timing settles, where the handpan sounds most open and which rhythms make you want to keep playing. Those moments are clues to your personal musical voice.

Rhythm is not a hurdle to clear before you become creative. It is the gentle current beneath your creativity. Return to these exercises often, and let every steady beat make a little more room for calm, connection and your own unmistakable sound.

Best Tongue Drums for Kids: What to Choose

Best Tongue Drums for Kids: What to Choose

Best Tongue Drums for Kids: Top Picks & Tips

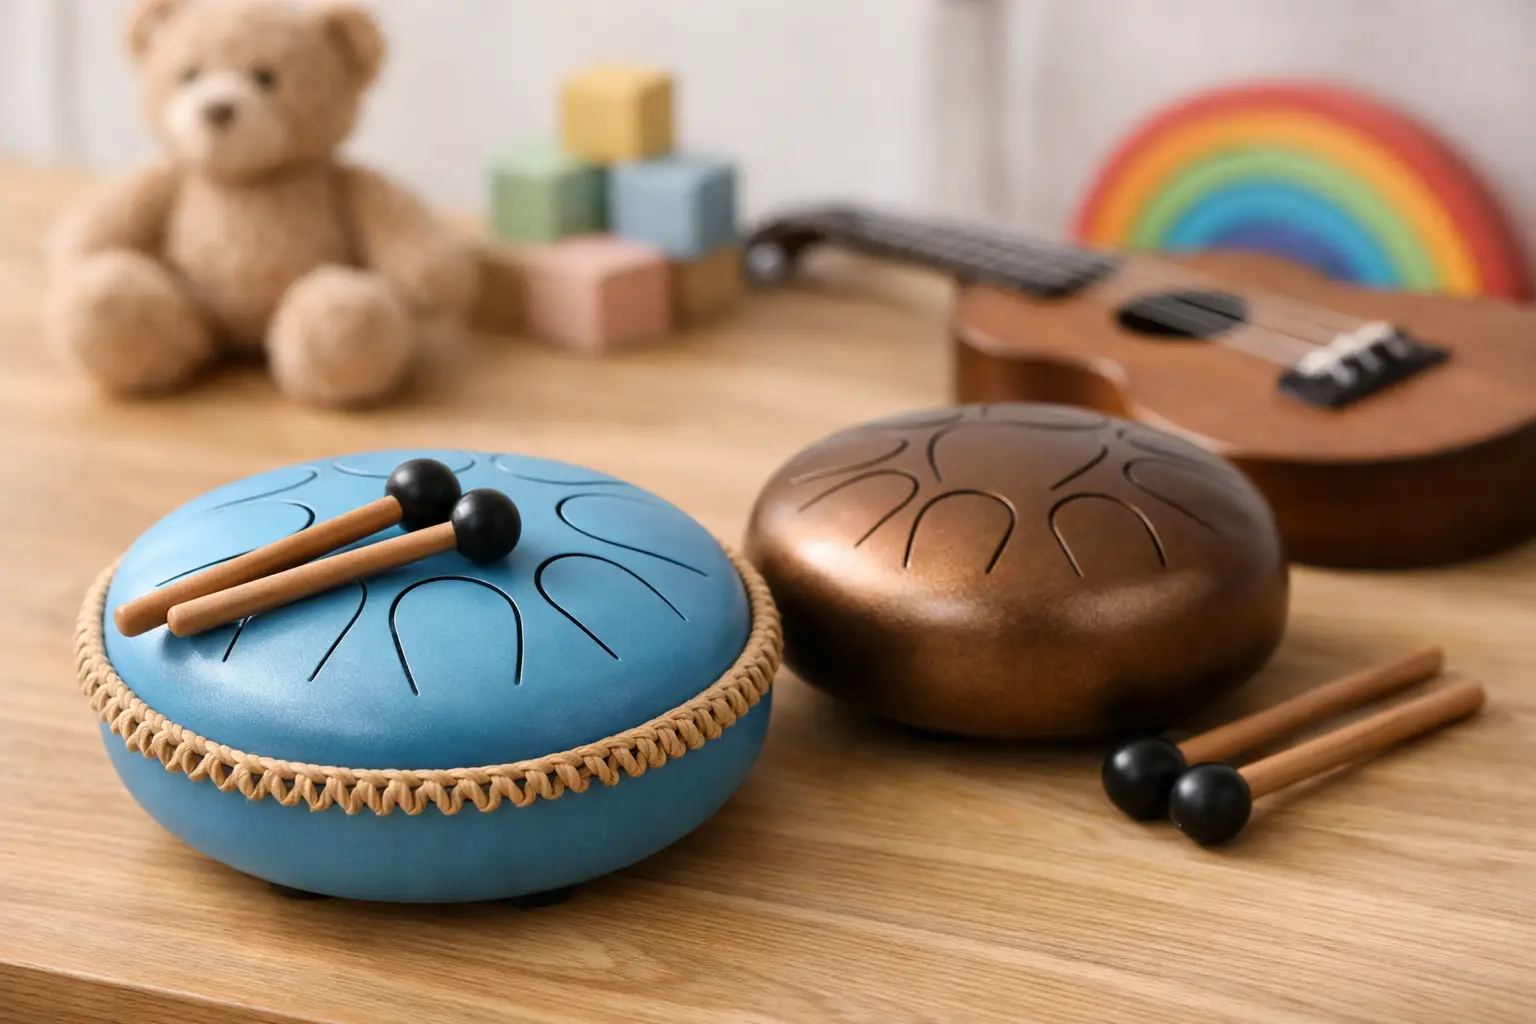
A child does not need to know a single chord to make a tongue drum sound beautiful. One gentle tap can fill a room with warm, bell-like notes, and because the notes are arranged to work together, even a first attempt can feel like a tiny piece of music. That is what makes the best tongue drums for kids so special: they invite curiosity without making children feel they have to get it right.

For families, educators and wellbeing practitioners, a tongue drum can become more than a novelty instrument. It is a tactile way to explore rhythm, listening and self-expression. The right choice depends on a child’s age, attention span, sensory preferences and the way the instrument will be used – quiet moments at home, music sessions in the classroom, or shared creative play.

What makes a tongue drum child-friendly?

The most suitable first tongue drum is rarely the one with the most notes, the loudest voice or the most elaborate finish. It is the one a child can comfortably hold, hear clearly and return to again and again.

A good children’s tongue drum has a reassuring feel. Its edges should be smoothly finished, its coating should be durable, and its sound should be clear rather than harsh. Steel tongue drums are especially popular because they offer a long, calming sustain and can handle everyday use better than many delicate instruments. Even so, they are musical instruments, not toys to be tossed about, so a padded carry bag and a simple place to store the drum make a real difference.

Size matters as much as sound. A compact drum is easier for small hands to reach across, whether it is played on the floor, on a lap or on a low table. Larger drums can offer deeper resonance and more notes, but may be awkward for younger children to manage independently. For many beginners, a small-to-medium steel tongue drum offers the loveliest balance of portability, tone and playability.

It is also worth considering volume. Tongue drums are generally gentler than many percussion instruments, but a bright, high-pitched small drum can still carry in a quiet home or classroom. The warm, rounded voice of a well-made instrument is often more pleasant for repeated play, particularly for children who are sensitive to sharp or unpredictable sounds.

The best tongue drums for kids are simple to play

A tongue drum works by striking the cut-out metal tongues on its surface. Each tongue produces a different note. Unlike a keyboard, where a child can easily land on notes that clash, many tongue drums are tuned to a carefully chosen scale. This creates a forgiving musical space where improvised patterns tend to sound connected.

For a first instrument, fewer notes can be a strength. Six, eight or 11 notes are enough to create melodies, rhythmic patterns and gentle soundscapes without presenting too many choices at once. A drum with more notes gives a growing musician more range, but young players can find a crowded layout confusing or simply stick to the same few tongues.

Choose a scale that welcomes experimentation

The scale is the emotional character of the drum. Major scales often sound bright, open and playful. Pentatonic scales use fewer notes and are particularly easy to improvise on, making them a wonderful fit for children. Minor scales can be soft, reflective and deeply soothing, and may appeal to families who want an instrument for winding down, yoga or quiet creative time.

There is no universal ‘best’ scale. A cheerful C major tongue drum can be a lovely choice for singing familiar tunes and learning basic musical ideas. A pentatonic scale may suit a child who prefers to make up their own patterns without instruction. A parent or practitioner seeking a more meditative sound may lean towards a gentle minor tuning.

When possible, listen to the character of a scale before choosing. The sound should make you want to pause and play. Children respond strongly to tone, even when they cannot yet explain why one instrument feels more inviting than another.

Fingers, mallets or both?

Mallets produce an immediate, full sound and can help a young child hear the note clearly with very little effort. They are ideal for early rhythm games, call-and-response activities and playing simple colour or number-coded songs. Look for soft rubber or felt-tipped mallets, rather than hard beaters that can create a sharper attack.

Finger playing is equally valuable. It feels more direct and teaches children how touch changes sound. Softer taps create a delicate voice, while a more confident strike brings out the drum’s resonance. A tongue drum that responds well to both fingers and mallets gives a child room to grow.

For younger children, always check the manufacturer’s recommended age and supervise use. Mallets and removable accessories can be unsuitable around children who still mouth objects. A compact instrument should also be placed on a stable surface, rather than balanced precariously on furniture or a high chair tray.

How to choose by age and stage

Age is useful as a guide, but temperament is often the better measure. Some preschoolers will happily tap two notes and invent a story around them. Some older children will want to learn songs straight away. Choose for the player in front of you, not only the number on the birthday card.

For preschool-aged children

Keep it uncomplicated. A smaller drum with a limited number of clearly spaced tongues is easier to explore. At this stage, the joy is in cause and effect: tap, listen, repeat. Let children discover the difference between fast and slow, loud and soft, one note and many.

Short shared sessions work beautifully. You might play a steady beat while they answer with a sound of their own, or take turns choosing a note for a bedtime sound ritual. There is no need to turn every moment into a lesson.

For primary school children

A drum with eight to 11 notes can support more deliberate musical play. Simple song sheets using numbers, letters or coloured stickers can help children build confidence, especially if they enjoy structure. They can also begin creating repeating patterns – a valuable foundation for rhythm and composition.

This is a good age to introduce listening as part of playing. Ask them which note sounds like rain, which sounds like a giant’s footsteps, or which pattern feels peaceful. These prompts develop musical language without making music feel academic.

For older children and young teens

Older beginners may appreciate a larger range, a more nuanced tuning or a deeper-bodied drum with longer sustain. They are more likely to explore composition, play alongside another instrument, or use the drum as a calming break from screens and busy routines.

A quality tongue drum can hold its place as their skills develop. It may start as a personal instrument for quiet improvisation, then become part of a school performance, a songwriting session or a family jam.

Steel, wood and build quality

Most tongue drums marketed for children are steel, and for good reason. Steel offers a resonant, singing tone that lingers after each strike. A properly tuned steel drum also tends to keep its musical identity through regular use, provided it is cared for well.

Wooden tongue drums have a different appeal. They are often lighter and can sound warm and percussive, with a shorter sustain. They may suit a child who likes a more immediate, rhythmic sound or a family looking for an instrument with a natural, organic appearance. The trade-off is that wooden models can vary more in projection and tonal depth.

Whichever material you choose, inspect the practical details. A reliable drum should have smooth edges, stable tuning, a finish that does not feel rough or flaky, and notes that speak evenly across the instrument. Very cheap drums can be tempting, but uneven tuning can make a child feel that their playing is the problem when the instrument itself is limiting the experience.

Creating a musical relationship, not a practice chore

A tongue drum is at its best when it is easy to reach for. Keep it somewhere visible and safe: perhaps in the lounge room, a reading nook, a classroom music corner or a calm space used for breathing exercises. If it lives zipped away in a cupboard, it is less likely to become part of everyday creative life.

Try making a small ritual around it. A child might play three slow notes before bed, create a ‘weather song’ after school, or use the drum to mark the start of a family meditation. In a group setting, each person can add one note to a shared soundscape. These moments teach patience, turn-taking and attentive listening without announcing themselves as lessons.

At Handpans Australia, we see melodic percussion as an invitation to connect – with rhythm, with stillness and with the small musical ideas that arrive when there is room to listen. Give a child an instrument that sounds kind from the first touch, and they may carry that sense of possibility far beyond the final ringing note.

What Makes a Handpan Instrument So Captivating?

What Makes a Handpan Instrument So Captivating?

What Makes a Handpan Instrument So Captivating?

A handpan instrument can change the mood of a room with the first gentle strike. Notes bloom rather than simply sound, carrying a warm metallic resonance that invites you to slow down and listen. For some players, that is the beginning of a personal creative ritual. For others, it becomes a voice on stage, in a yoga class, or alongside other acoustic instruments.

Its appeal is not only in the sound. A handpan welcomes musical exploration without demanding years of formal theory before the experience becomes rewarding. You can sit with it for ten quiet minutes, follow a simple pulse, and find phrases that feel surprisingly complete. Yet the same instrument has enough depth to keep experienced percussionists and composers curious for years.

What is a handpan instrument?

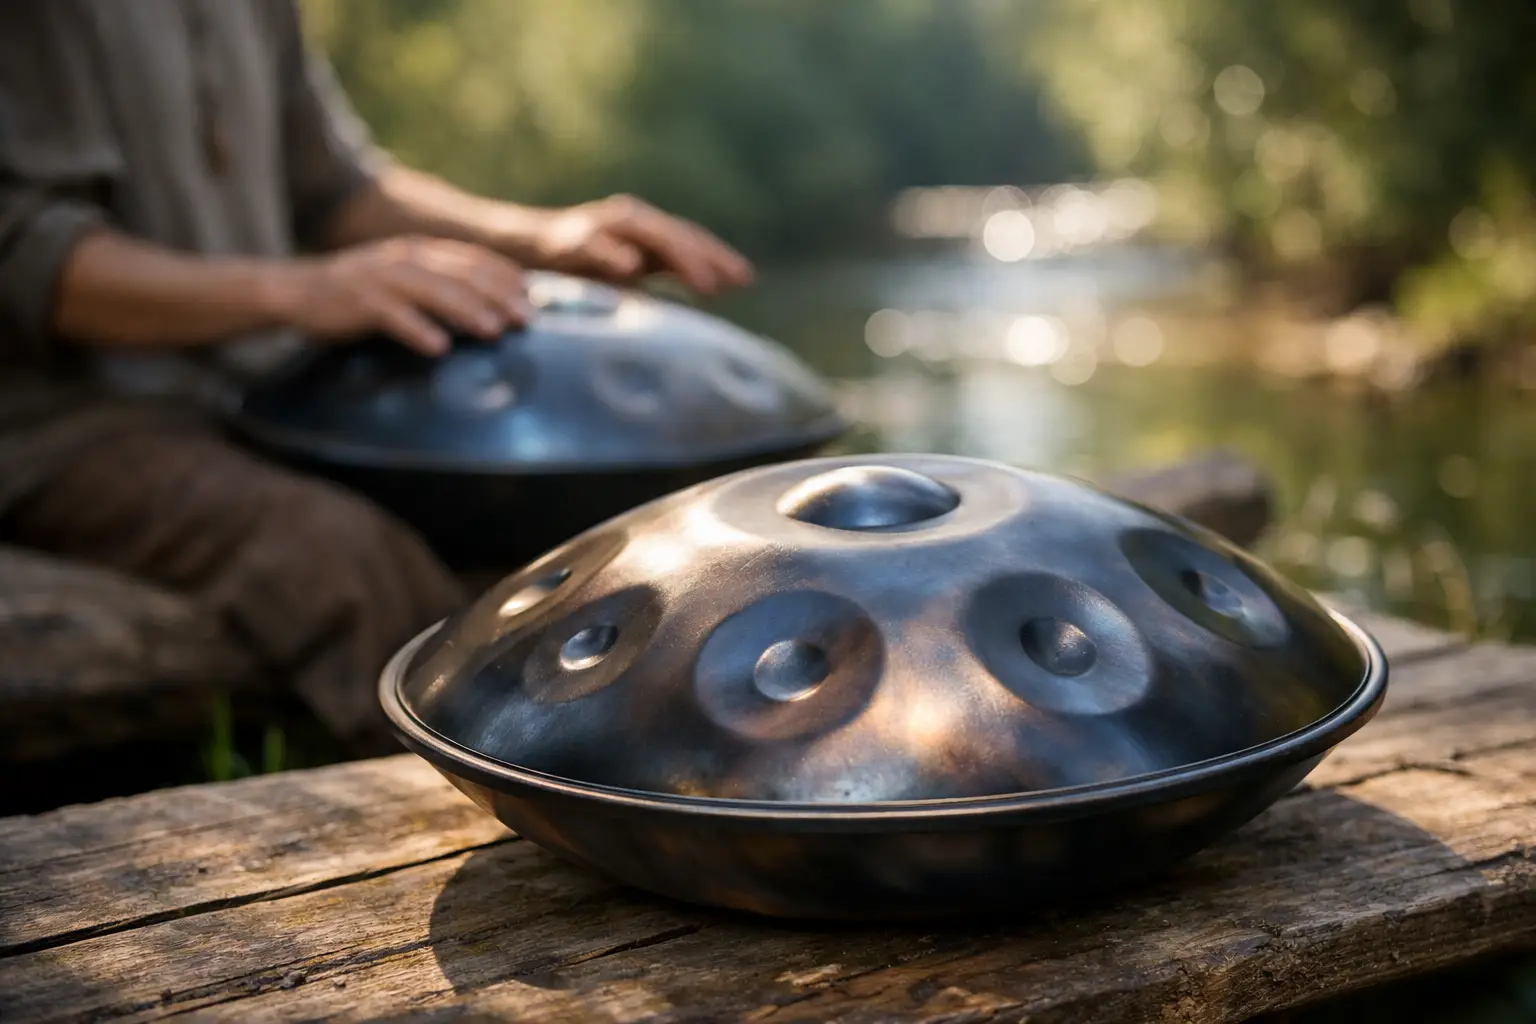
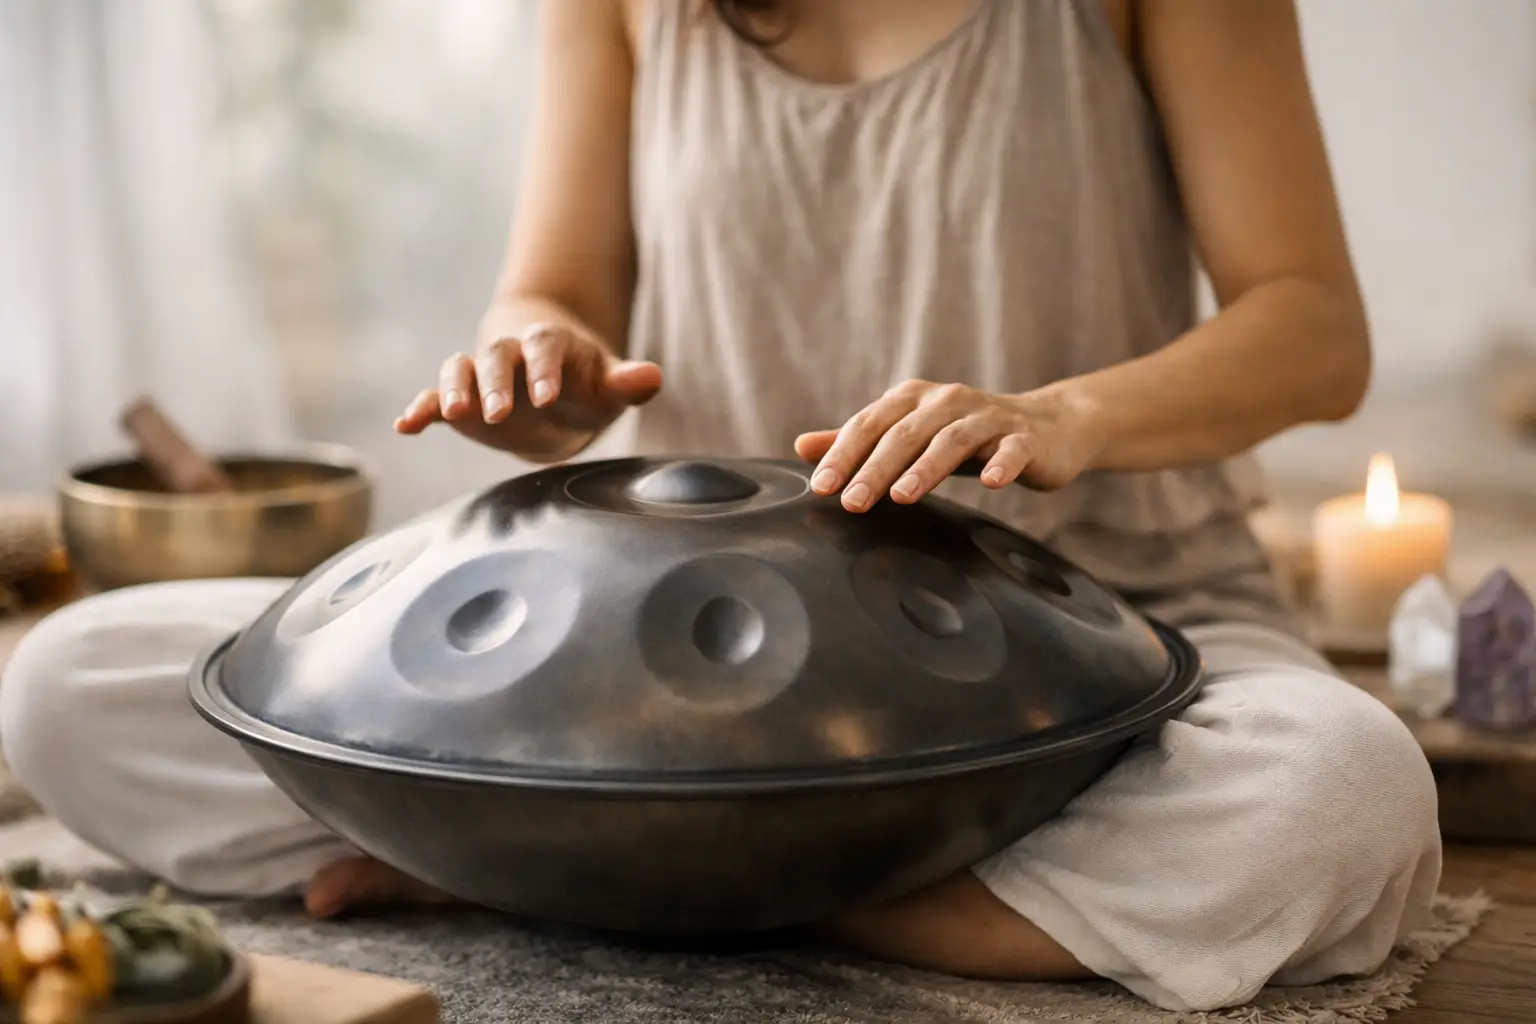
A handpan is a tuned steel instrument played primarily with the hands and fingers. Its rounded, UFO-like form contains a central note, often called the ding, surrounded by tone fields that produce a set of carefully chosen notes. Each field can carry more than one pitch, so a light, well-placed touch may reveal a bright fundamental note, a higher harmonic, or a soft percussive texture.

The modern handpan belongs to a broader family of melodic steel percussion instruments. It is related in spirit to the steel pan, but it has its own playing technique, shape and intimate character. Rather than standing over a large drum, players commonly place a handpan on their lap, a stand, or a soft surface that allows the shell to resonate freely.

Most handpans are built around a particular scale. This is one reason they feel approachable: the notes are selected to work harmoniously together. You are free to improvise, repeat a motif, or let your hands wander without constantly worrying that a note will clash.

That does not mean every handpan sounds the same. Far from it. Scale choice, note layout, steel treatment, tuning, maker skill and your own touch all shape the instrument’s personality.

Why the sound reaches people so deeply

A handpan has a rare balance of melody, rhythm and resonance. One hand can hold a steady beat while the other traces a melodic line. A single note can be crisp and bell-like, while the space after it feels spacious and lingering. That blend makes the instrument feel both grounding and expressive.

For a beginner, the immediate pleasure often comes from being able to create a musical atmosphere without reading a score. There is room to play slowly, make mistakes, listen again and turn a simple pattern into something personal. The instrument does not rush you.

For more experienced musicians, the attraction is often in the detail. Dynamics matter. Where the finger lands matters. The angle, rebound and weight of a strike can bring out a clean tone, a muted tap, a slap-like accent or a shimmering harmonic. Handpans reward close listening as much as they reward technique.

This is why they work beautifully in different settings. A player may use one for quiet evening practice, reflective songwriting, meditation sessions, live looping, small ensemble work or a performance that needs an organic, memorable texture. In wellness spaces, the sound can help create a calm and attentive environment, though the instrument is not a substitute for clinical care or therapeutic support.

The role of rhythm

People sometimes hear a handpan and focus only on its floating melody. Rhythm is just as central. The shell itself offers a palette of gentle percussion: taps around the rim, low pulses from the centre, muted strokes and pauses that create movement without clutter.

You do not need to play fast to sound musical. In fact, many compelling handpan pieces rely on a patient pulse and a few well-chosen notes. A slower approach gives the resonance room to breathe and helps you hear how one phrase leads naturally into the next.

Choosing a handpan instrument that suits you

The best handpan is not automatically the one with the most notes, the deepest bass or the most elaborate finish. It is the one that makes you want to sit down and play. Your musical goals, listening preferences and practical needs should guide the choice.

Start with the scale and mood

The scale is usually the most meaningful place to begin. Minor scales are widely loved for their reflective, earthy and cinematic mood. They can feel calm, mysterious or emotionally rich without being difficult to play. Major scales often bring a brighter, more open character that suits uplifting melodies and communal music-making.

There are also scales with distinctive cultural or modal flavours, offering sounds that may feel meditative, expansive or rhythmically playful. If you are drawn to music that creates stillness, listen for a scale that feels settled when you repeat a few notes. If you want to sing, jam or compose with others, consider which tonal centre will fit the music you already enjoy.

There is no universal “healing scale” or one correct choice for meditation. Personal response matters most. The right scale is often the one that makes your shoulders drop and your imagination switch on.

Consider note count and range

A handpan with fewer notes can be wonderfully focused. It offers a clear musical world and leaves room to learn touch, timing and rhythm. For many first-time players, this simplicity is a strength rather than a limitation.

More notes provide a wider melodic range and greater compositional possibility. They can suit players who want bass movement, extended melodies or more harmonic colour. The trade-off is that a larger note count may require more familiarity with the layout and a more deliberate playing approach.

Neither option is better in every situation. If your goal is peaceful, intuitive playing at home, a compact and coherent layout may be ideal. If you perform, record, or build layered arrangements, extra range may be worth prioritising.

Listen for craftsmanship, not just volume

A quality handpan should respond clearly to a light touch. The notes should feel balanced across the instrument, with sustain that is musical rather than muddy. Tuning stability, separation between notes and consistent tonal character are signs worth paying attention to.

Steel choice also influences the experience. Nitrided steel is often valued for its crisp attack and comparatively direct sound, while stainless steel can offer longer sustain and a softer, more open bloom. These are broad tendencies, not hard rules. The maker’s tuning and construction have an enormous effect, so listening closely is more useful than relying on material labels alone.

A handpan is a considered instrument, and it deserves considered care. Keep it dry, protect it from knocks, avoid leaving it in a hot car, and use a case that supports safe transport. Depending on the steel and finish, regular cleaning and appropriate oiling may also help prevent corrosion. A little attention protects both the surface and the sound you fell for in the first place.

Learning through touch, not pressure

Many people put off playing an instrument because they imagine lessons, scales and the fear of getting it wrong. The handpan can offer another way in. Begin by finding a comfortable seated position and striking one tone field with relaxed fingertips. Let the hand rebound rather than pressing into the steel.

Then try a simple conversation: centre note, outer note, centre note, outer note. Keep the tempo unhurried. Once that feels natural, add a second outer note and notice which combinations draw you back. This is genuine musical learning, even if you are not naming every interval or counting every beat.

As your confidence grows, you can develop hand independence, explore accent patterns, learn songs, play with a metronome or record short ideas on your mobile. Structure can be useful, especially when you want to improve, but it should support curiosity rather than flatten it. A few minutes of attentive practice several times a week will usually take you further than one intense session followed by a month away.

Playing with others can be especially rewarding. Handpan pairs naturally with guitar, voice, flute, strings, frame drums and ambient electronic textures. A tongue drum may offer an even gentler and more compact entry into melodic percussion, while a Native American flute can weave a breath-led melody over the handpan’s pulse. Each instrument has its own voice, and together they can create a richly spacious arrangement.

Make room for your own sound

There is no need to perform a handpan in the same way as anyone else. Some players build intricate rhythmic compositions. Some return to a small group of notes after work to clear their head. Some use the instrument to hold a room’s attention, while others keep it entirely private.

The value is in the relationship you build with the sound. Choose a scale that feels honest to you, learn enough technique to let the notes ring clearly, and leave space for the unexpected. When your hands begin to recognise the instrument, a handpan can become less like an object you own and more like a place you return to.

Tongue Drum Versus Kalimba: Which Suits You?

Tongue Drum Versus Kalimba: Which Suits You?

Tongue Drum vs Kalimba: Which Is Right for You?

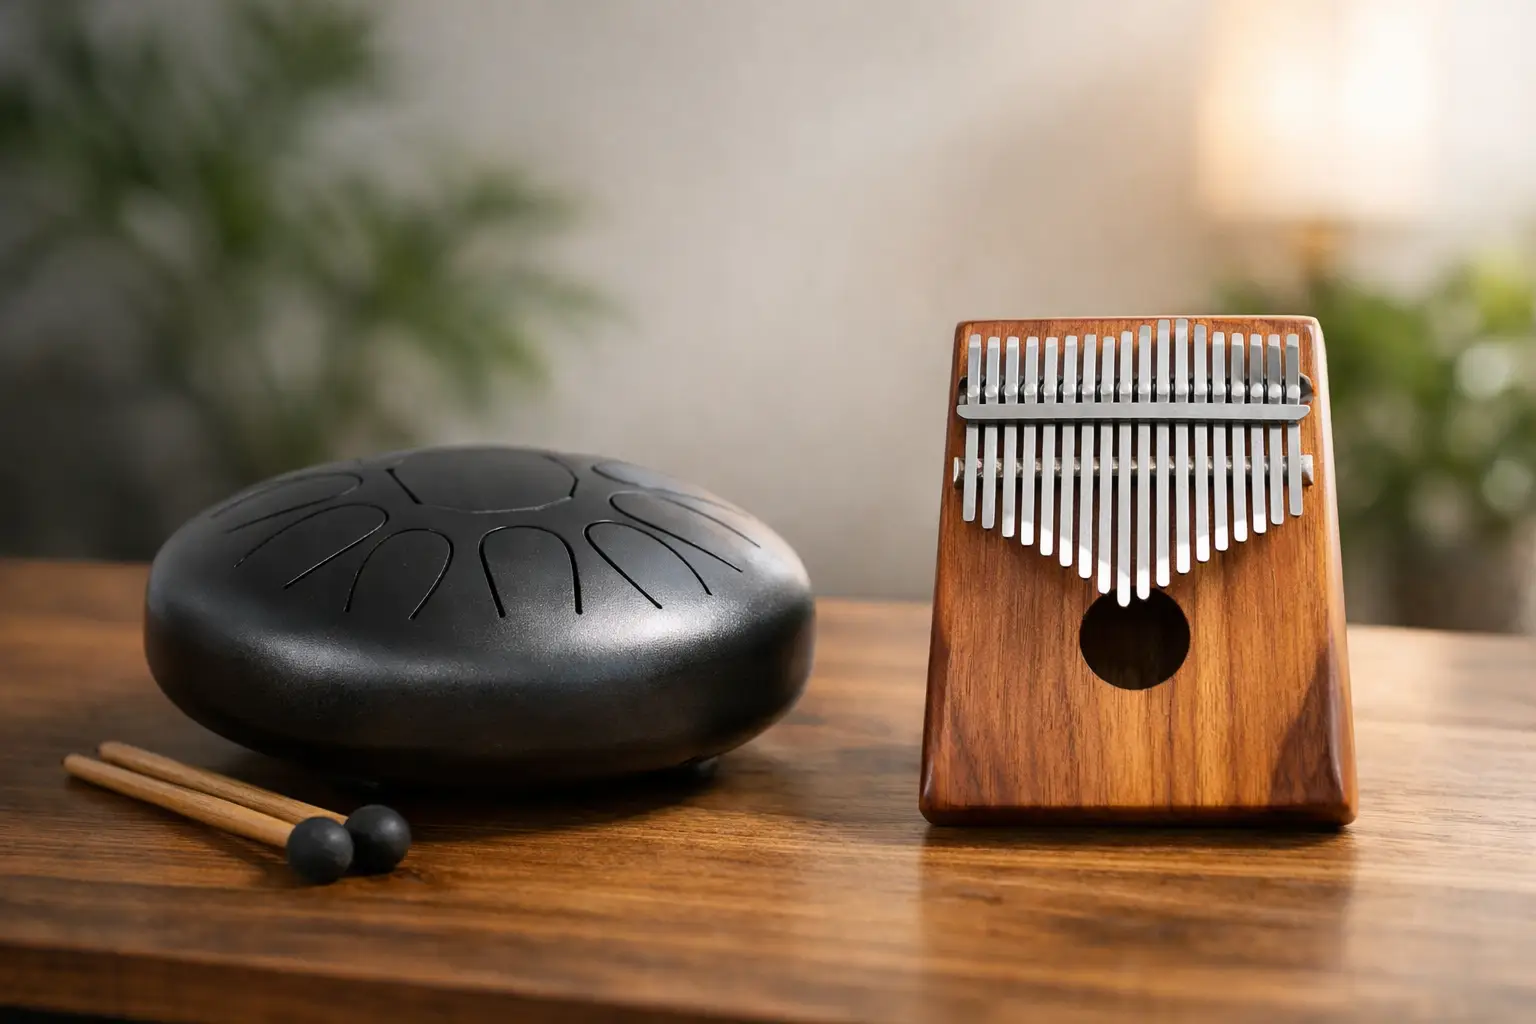
A tongue drum versus kalimba comparison is really a choice between two very different kinds of musical intimacy. One surrounds you with rounded, resonant steel tones; the other places a bright, delicate melody directly beneath your thumbs. Both are approachable, portable and wonderfully suited to improvisation, but the feeling they create in a room – and in your hands – is distinct.

For a quiet creative practice, a meditation space, a classroom or a live acoustic set, either instrument can become a faithful companion. The better choice depends less on which is ‘easier’ and more on the sound you want to return to.

Tongue drum versus kalimba: the essential difference

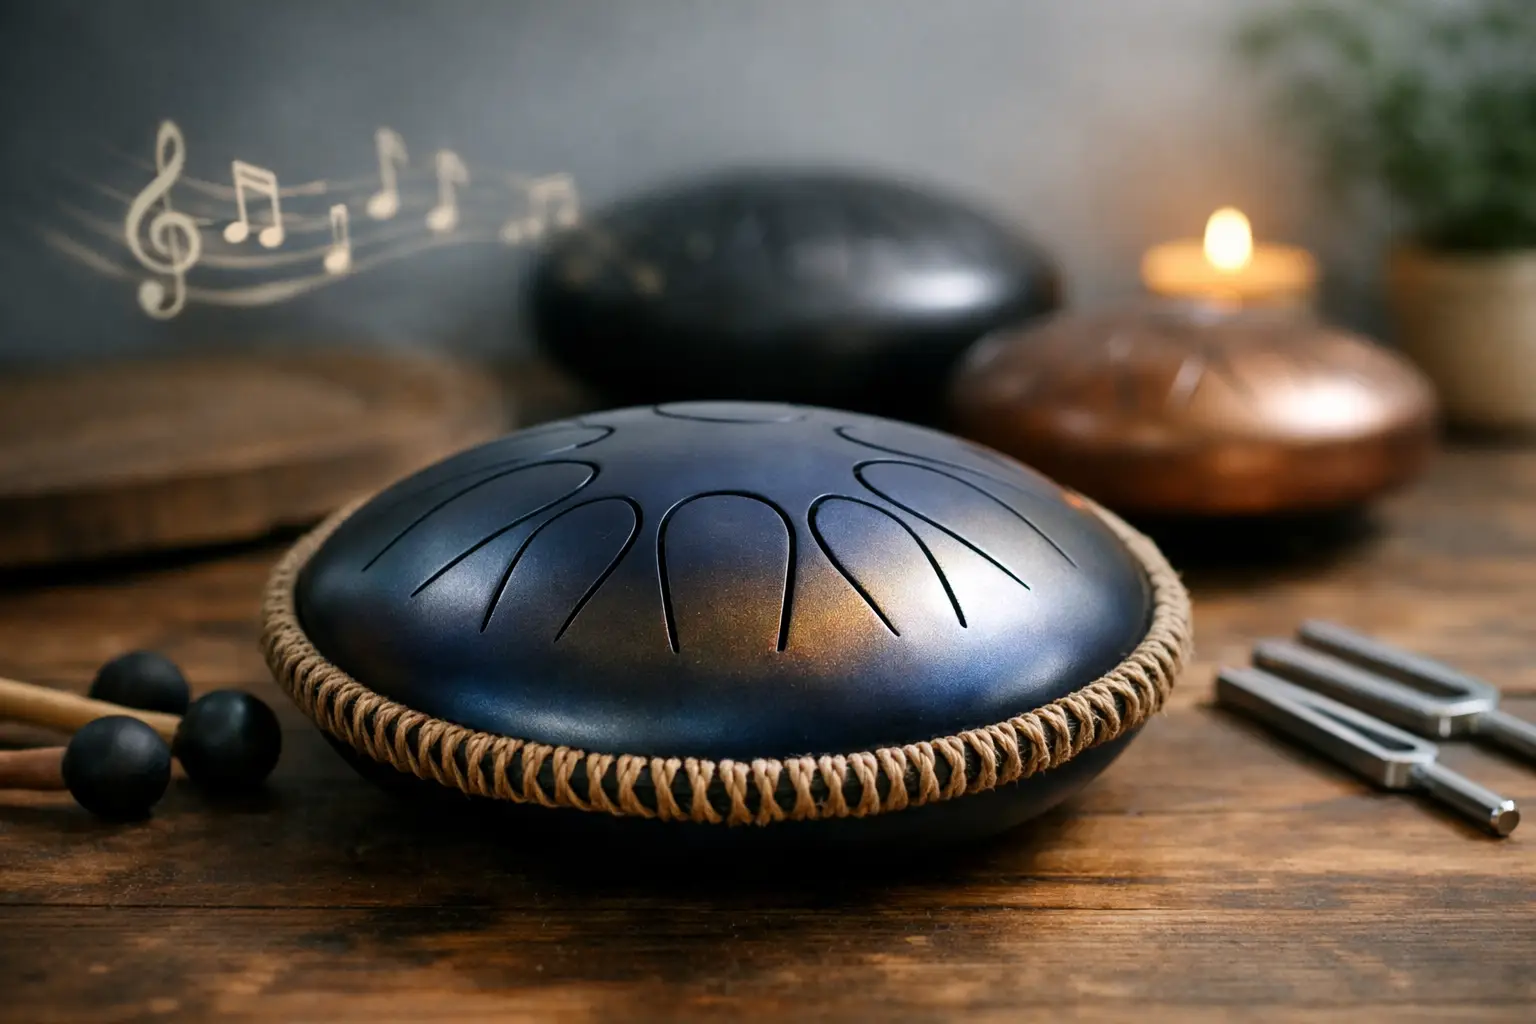
A tongue drum is a tuned steel percussion instrument. Its notes are formed by cut-out tongues in the metal surface, which are struck with fingers or soft mallets. Most are made in a particular scale, so the notes naturally work together. This makes it possible to create flowing patterns without needing to stop and calculate which note comes next.

A kalimba, sometimes called a thumb piano, produces sound from metal tines fixed to a wooden board or hollow box. You pluck those tines with your thumbs, creating a clear, bell-like voice. Kalimbas also come in tuned scales, although their layout often asks you to become familiar with a pattern that spreads out from the centre rather than moving simply from low to high.

The difference is immediate when you play them. A tongue drum feels percussive, spacious and grounding. A kalimba feels nimble, intimate and melodic. Neither is a lesser version of the other. They invite different musical gestures.

Sound: warm steel resonance or bright thumb-picked notes?

Tongue drums have a soft attack followed by a lingering, rounded sustain. Depending on their size, material and tuning, they can sound earthy and deep or crisp and celestial. The notes tend to blend into one another beautifully, giving even simple playing a calm, immersive character.

That resonance makes a tongue drum particularly appealing for slow improvisation, yoga, meditation and sound-based wellbeing sessions. A single note can hang gently in the air, leaving room for breath and silence. Played with mallets, it can offer a fuller, more projected sound for a small group or performance setting.

The kalimba’s voice is more immediate and sparkling. Each tine has a defined pluck, often with a subtle metallic shimmer. Notes generally fade sooner than a tongue drum’s steel resonance, so melodies can feel more articulated and rhythmic. This is part of the charm: the kalimba can sound like a tiny music box, a gentle harp or a set of bright bells, all held in your hands.

If you are drawn to low, meditative tones that fill a space, a tongue drum is likely to feel more satisfying. If you love detailed melodies, crisp plucked textures and the closeness of an instrument played near your chest, the kalimba may speak more directly to you.

Volume and presence in a room

A tongue drum is usually the stronger choice when you want your sound to be heard beyond your immediate seat. Larger drums carry more body and lower frequencies, while smaller models remain beautifully portable without becoming silent. You can play softly with fingertips or build gentle dynamics with mallets.

A kalimba is naturally quieter. It is ideal for personal practice, recording close to a microphone, bedtime playing or calm moments where you do not want to dominate the room. In a noisier environment, though, its subtle voice can be lost unless amplified.

Which instrument is easier to learn?

Both instruments welcome beginners, especially when they are tuned to a carefully chosen scale. You do not need formal music theory to make something that sounds musical. Still, they offer ease in different ways.

A tongue drum is often the more intuitive starting point for someone who wants to relax into sound straight away. The notes are laid out visibly across the top, and a player can strike one tongue at a time, alternate hands or repeat a simple rhythm. Because the scale is already harmonious, accidental combinations often sound pleasing rather than wrong.

This can be deeply reassuring for adults returning to music after years away from it, or for anyone who feels they are ‘not musical’. A simple pulse on one or two notes can become a meditative practice. From there, you can gradually add patterns, pauses, accents and melodic phrases.

A kalimba also has a gentle learning curve, but its layout takes a little more patience. The tines are usually arranged with lower notes near the centre and higher notes moving outward on both sides. That design is efficient once your thumbs understand it, yet it can feel less obvious at first than the circular layout of a tongue drum.

For players who enjoy learning recognisable songs, the kalimba has a particular advantage. Its plucked notes are well suited to clear melodies, and many simple arrangements can be played with repeating thumb patterns. It rewards a little focused practice with lovely, detailed results.

Feel, technique and musical expression

Playing a tongue drum can feel wonderfully physical. Your hands move above the instrument, tapping, brushing and responding to the resonance beneath your fingers. Fingertips produce a warm, direct sound, while mallets create more volume and a softer rounded attack. There is room to explore rhythm as much as melody.

This makes the tongue drum a natural fit for people who are attracted to handpan music but want a smaller, more accessible steel instrument. It shares some of the handpan’s inviting quality: you can sit with it, follow your ear and let a phrase emerge without forcing it.

The kalimba creates a different kind of connection. It is held in both hands, with thumbs doing most of the work. That close contact can feel private and comforting, almost like humming a melody to yourself. Some players add subtle vibrato by moving the instrument against a surface or by using a kalimba with resonating features, giving individual notes a wavering, singing quality.

There are practical considerations too. Players with sensitive thumbs may need time to build comfort on a kalimba, especially during longer sessions. Tongue drums are generally easier on the hands, although mallet technique and posture still matter. Conversely, a kalimba may be easier to hold while travelling, sitting on a train or playing in a small lounge room.

Portability, care and everyday use

A kalimba is hard to beat for compactness. Many fit comfortably into a small bag and weigh very little. It is an easy instrument to bring along for a weekend away, a quiet break at work or a spontaneous melody outdoors.

Tongue drums are still very portable, particularly smaller models, but they are heavier and need more room. They are best carried in a fitted bag or case to protect the finish and prevent knocks. Like other steel instruments, they should be kept dry and cared for according to their material and coating. A quality tongue drum deserves the same mindful handling as any resonant instrument.

Tuning is another point of difference. Kalimba tines can often be adjusted with a tuning hammer, although this needs a careful ear and a little patience. Tongue drums are not designed for casual retuning. Choose a scale you genuinely love from the start, because it will shape the moods, melodies and musical partnerships available to you.

Choosing the right scale matters more than choosing the ‘best’ instrument

Whether you choose steel or tines, the scale will influence your experience every time you play. Major scales tend to feel open, bright and uplifting. Minor scales can feel reflective, spacious or quietly emotional. Pentatonic tunings are especially friendly for free playing because their notes blend with very little effort.

Think about where the instrument will live in your life. For personal calm, a lower-toned tongue drum in a soothing scale can become a beautiful daily ritual. For melodic exploration on the couch, while travelling or alongside a favourite song, a kalimba may offer exactly the right amount of detail and sparkle.

At Handpans Australia, the most meaningful choice is never only about specifications. It is about the sound that makes you pause, listen and want to play one more phrase.

If possible, let your ear lead before your head does. Imagine the instrument in your own hands: the room you will play in, the pace of your breathing, the kind of sound you hope to make when words are not needed. The right instrument is often the one that invites you back tomorrow.

Handpan Finger Striking Techniques That Sing

Handpan Finger Striking Techniques That Sing

Handpan Finger Striking Techniques That Sing

A handpan can sound vast and luminous with very little effort – but only when the touch is right. Handpan finger striking techniques are less about hitting harder or memorising complex patterns, and more about learning how to invite the steel to resonate. A light, intentional strike can create a clear, singing note. A rushed or heavy one can make even a beautiful instrument sound muted.

For beginners, this is encouraging news. You do not need a percussion background to make music that feels personal. For experienced players, refining the way each finger meets the surface opens up greater control over tone, rhythm and emotional shape. If you’re learning these techniques for the first time, exploring the right instrument is just as important. Browse our handpan collection to find handpans in different scales, tunings and tonal styles.

The foundation of handpan finger striking techniques

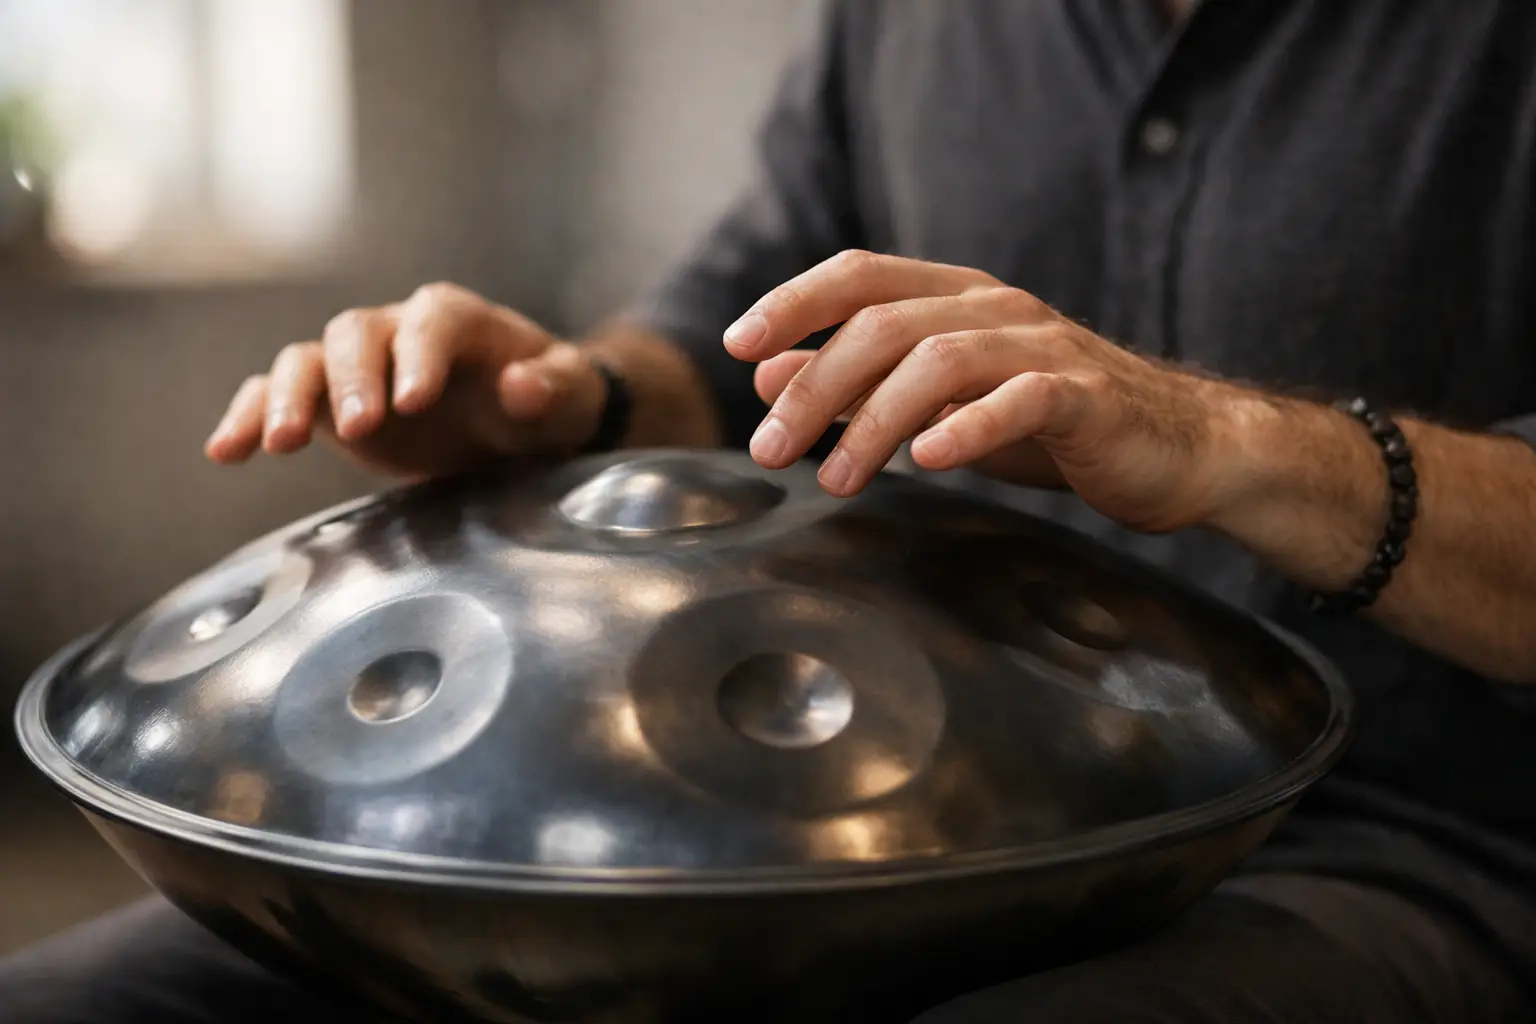
The handpan is designed to respond to a relaxed, quick contact. Think of the motion as a gentle bounce rather than a tap that stays on the steel. Your finger arrives, makes contact and leaves immediately, allowing the note to bloom into the air.

If your hand lingers on the playing surface, it can choke the vibration. If you strike with a stiff finger or too much force, the sound may become sharp, clunky or overly percussive. The sweet spot sits between these extremes: a soft, confident rebound that lets the instrument do the work.

Sit with the handpan stable on your lap, with both feet grounded. Keep your shoulders low and your wrists loose. Tension has a way of travelling from the neck and forearm into the fingertips, so take a breath before you begin. A settled body creates a settled sound.

Use the pads, not the tips

For most melodic notes, strike with the fleshy pad of the finger rather than the very tip or nail. The pad creates a warmer attack and is kinder to both your hands and the instrument. Your index and middle fingers will likely do much of the work at first, though every finger has a different colour to offer.

Try placing your hand above a tone field as though you are holding a small ball. Let one finger drop from the knuckle, then rebound. There is no need to lift the finger high. In fact, a small movement is often more accurate and musical than a dramatic one.

The exact contact point matters. Most notes respond best when struck around the outer area of the tone field, rather than directly in its centre. The centre can produce a more focused sound, while the edge often gives you a rounder, more open voice. Spend a few quiet minutes exploring both. Every handpan has its own response and character, so choosing a well-made instrument is an important part of developing good technique. Explore our range of handpans to find an instrument suited to your playing.

Finding a clear note without forcing it

A clear note begins before the strike. Hover your hand close to the surface and decide where the finger will land. Then make one clean contact. Avoid dragging your finger across the steel or following through as if you are pushing a button.

Listen for three things: the initial attack, the pitch and the sustain. A pleasing strike has a gentle beginning, a stable centre and enough space afterwards for the note to ring. If you hear a dull thud, reduce the pressure and shorten the contact. If the sound is thin, try moving slightly around the tone field or using more of the finger pad.

Volume does not come from force alone. A stronger sound usually comes from a slightly more decisive, well-timed rebound. It is a useful distinction for players who find themselves hitting harder when they cannot hear a note clearly. On a handpan, force can close the sound down. Ease and precision tend to open it up.

Let the ding breathe

The central note, known as the ding, often carries the emotional centre of the scale. It can provide a deep, grounding pulse beneath higher notes, especially in reflective improvisation or a sound-based wellbeing setting.

Strike the ding with a relaxed finger pad, usually near its upper curve rather than flat in the middle. Give it room after each note. Repeating it too quickly can crowd the resonance, while placing it with patience creates a spacious foundation for the rest of the instrument.

Try alternating one ding strike with a note from the tone circle. Leave a pause between phrases. This simple conversation between low and high sounds can become a complete piece of music, particularly when you allow the natural sustain to guide your next choice.

Build rhythm with alternating hands

Once individual notes sound clear, alternating hands is the next important step. It helps your playing flow, prevents one hand from becoming fatigued and makes faster patterns feel natural rather than frantic.

Start with a single note or two neighbouring notes. Play right, left, right, left at a slow, even pace. Keep each strike identical in intention, but do not aim for mechanical perfection. Handpan music often feels most alive when there is a subtle human rise and fall in the rhythm.

From there, create a simple pulse: one lower note for grounding, followed by two higher notes for movement. For example, play ding, right-hand note, left-hand note, then rest. Repeat it until it feels comfortable, then change one of the higher notes. You are not just practising coordination here – you are learning how melody can sit inside rhythm.

For meditation, yoga or quiet personal practice, slower rhythms with generous rests can be especially effective. In a live performance, you may choose tighter patterns and stronger accents. Neither approach is more correct. The setting, the scale and the feeling you want to create should shape your touch.

Add colour with softer and sharper strokes

Not every handpan sound needs to be a full, ringing note. A varied touch gives your playing texture, much like changes in breath give shape to a flute phrase.

A soft finger-pad strike creates the warm, rounded sound most players begin with. A slightly firmer flick from the finger can add a brighter accent. You may also use the side of the thumb or the heel of the hand for gentle, low percussive sounds on suitable areas of the shell. These techniques should support the melody, not overwhelm it.

Be cautious with hard knuckle strikes, heavy palm hits and fingernails. Some players use more percussive sounds creatively, but they require control and an understanding of the instrument’s response. For daily practice, a relaxed finger-led approach is the safest path to beautiful tone and long-term comfort.

Common touch problems and what they are telling you

When notes sound inconsistent, the cause is usually physical rather than musical. A buzzing or choked note often means the finger stayed in contact too long. A loud clack with little resonance can mean you are using the fingertip, nail or too much downward force. Notes that vary wildly in volume may point to a tense wrist or fingers lifting too far away from the surface.

Rather than repeating the same strike and hoping it improves, slow down and change one small thing. Relax the shoulder. Lower the hand. Use less force. Move the contact point a centimetre. Listen again. This kind of patient experimentation is one of the most rewarding parts of learning a handpan.

It also helps to practise in short sessions. Ten focused minutes spent listening closely can do more for your touch than an hour of playing on autopilot. If your hands feel sore, stop. Handpan playing should feel expressive and sustainable, not like you are working against the instrument.

A simple practice ritual for better touch

Begin with one minute of single strikes, moving slowly around the tone fields and waiting for each note to fade. Then spend a few minutes alternating right and left hands on two notes. Finish by playing a small phrase that feels good to you, even if it uses only three sounds.

Recording a minute of your practice on your mobile can be revealing. While you play, your attention is on movement. When you listen back, you can hear whether the notes are clear, whether your rhythm rushes and where the resonance has room to shine.

Handpan finger striking techniques become part of your musical voice over time. Let your hands stay curious, let the pauses matter, and allow each clear note to lead you towards the next one. When you’re ready to find an instrument of your own, explore our handpans for sale and discover the scale and sound that speaks to you.

Drone Flute Selection Guide for First-Time Players

Drone Flute Selection Guide for First-Time Players

Drone Flute Selection Guide for First-Time Players

A drone flute creates a small sound world in your hands: one voice carries the melody while another holds a steady, grounding note beneath it. This drone flute selection guide is designed to help you choose an instrument that feels inviting from the first breath, whether you are drawn to quiet personal practice, sound-based wellbeing, recording or performance.

Unlike a standard Native American-style flute, a drone flute has two parallel chambers. The melody side is fingered in the familiar way, while the drone side provides a sustained tonal foundation. That extra layer can sound spacious and meditative, but it also changes the weight, reach and playing experience. The best choice is not automatically the deepest or most ornate flute. It is the one whose voice, size and tuning suit the way you want to make music.

Start with the sound you want to live with

Before comparing timber, keys or decorative details, listen for the emotional character that calls to you. A drone flute naturally creates a sense of continuity. The sustained note can support slow melodies, reflective improvisation and breath-led musical phrases without needing accompaniment.

For meditation, yoga or gentle sound journeys, many players enjoy a lower, warmer register. The drone sits beneath the melody like a calm current, leaving plenty of room for pauses and soft dynamics. For personal creativity, songwriting or playing alongside handpan and tongue drum, a mid-range flute often brings more clarity and presence. It can still feel earthy and resonant, while being easier to place within a mix.

There is no universal ‘healing’ key or one perfect frequency. Your relationship with the instrument matters more than a promise attached to a note. Choose a sound that makes you want to pick it up regularly. Consistent, attentive playing is where the deeper connection develops.

Choose a key that suits your hands and your ear

The key is one of the most meaningful decisions in any drone flute selection guide. It shapes the flute’s pitch, mood, physical size and how readily it may blend with other instruments.

Higher keys are generally smaller and lighter. They tend to speak easily with less air and offer a bright, clear voice. They can be a comfortable starting point for players with smaller hands, those returning to music after a break, or anyone who values portability. Their drone is present but usually less physically enveloping than that of a large, low flute.

Mid-range keys offer a beautiful middle ground. They retain warmth and depth while remaining manageable for many adult hands. If you are unsure where to begin, this range is often the most versatile for relaxed solo playing, learning simple melodies and joining acoustic instruments.

Lower keys create the broad, breathy resonance many people imagine when they first hear a drone flute. The melody can feel slow and spacious, and the drone has real weight beneath it. The trade-off is reach. Lower flutes are longer, their finger holes are further apart, and they may need more measured breath control. A low flute can be deeply rewarding, but it should feel comfortable rather than like a stretch you must endure.

If you already play handpan or tongue drum, consider the notes you use most often. Choosing compatible keys can make spontaneous sessions much more satisfying. You do not need to match every note perfectly, especially when playing atmospherically, but instruments with sympathetic tonal centres usually settle together more naturally.

Let comfort guide the decision

A drone flute has more body than a single-bore flute, so ergonomics deserve real attention. Notice the overall length, finger-hole spacing, body width and whether the maker offers offset holes. Offset holes can bring the lower finger positions closer to the hand’s natural reach, which is especially useful on larger instruments.

Do not assume that larger hands automatically mean you should choose the lowest key available. Ease matters because tension changes your breath and interrupts the calm, flowing quality that makes this instrument special. If possible, test a similar-sized flute or measure your comfortable finger span before deciding. A well-fitted mid-range flute will often give you more musical freedom than an imposing low model that stays on its stand.

Understand the role of the drone

The drone note is not an extra melody line. It is the musical ground beneath your phrases. On many instruments it is tuned to the fundamental note of the flute, while others may use a related interval such as a fifth. Each approach has its own feel.

A drone tuned to the fundamental produces a unified, centred sound. It is particularly forgiving for intuitive playing because the melody feels anchored to its home note. A fifth can create a more open, spacious harmony, with a little extra lift and movement. Neither is better. The fundamental often feels more settled; the fifth may appeal to players seeking a wider harmonic colour.

Ask whether the drone can be turned on and off independently. A controllable drone gives you two musical personalities in one instrument. You can play a clear single-flute melody when you want more space, then bring in the drone for a fuller, more immersive texture. This flexibility is valuable for recording, group playing and longer sound sessions where variation helps maintain attention.

It is also worth remembering that the drone needs breath. Playing both chambers can require a steadier, more supported airstream than playing a single flute. It is not difficult in a technical sense, but it asks you to slow down and become aware of your breath. For many players, that is part of the appeal.

Tuning, scale and playing with others

Most contemporary flutes are built around a pentatonic scale. This is one reason they feel so accessible: many note combinations sound naturally pleasing, allowing beginners to improvise without being trapped by complex theory. A drone flute can make this experience even more generous, as the sustained note creates a musical frame around simple phrases.

If you want to play alone, choose the scale whose character you enjoy most. If you plan to record with other instruments, perform with friends or use backing tracks, standard concert tuning at A=440 Hz is generally the practical choice. It makes communication and blending easier.

Some players prefer instruments tuned to A=432 Hz for personal or contemplative practice. The decision is personal, but it is worth being clear about the trade-off: a 432 Hz flute may not blend straightforwardly with instruments or recordings tuned to the more common 440 Hz standard. Rather than treating one tuning as inherently superior, choose the one that fits your musical setting.

Scale names and note layouts can vary between makers, so listen to recordings of the exact flute where possible. Two instruments in the same key may still have different voices due to their scale, bore design, wood and maker’s approach.

Material and craftsmanship shape the relationship

Wooden drone flutes are valued for their organic appearance, tactile warmth and individual voice. Different timbers can influence the instrument’s feel and tonal character, though design and craftsmanship are just as influential as the species of wood. A flute should be judged by how it sounds, responds and feels in your hands, not by timber name alone.

Pay attention to the quality of the finish, the alignment of the chambers, the clarity of the notes and the responsiveness from soft to fuller breath. A well-made flute should not make you fight for its voice. It should reward gentle air, allow you to swell into stronger notes, and keep the drone stable when you move through the scale.

Because wood responds to its environment, care matters in Australia and New Zealand’s changing conditions. Avoid leaving a flute in direct sun, a hot car or a damp corner. Let it warm gradually if it has been sitting in a cold room, and follow the maker’s guidance on cleaning and oiling. Thoughtful care protects the timber and preserves the sound you chose.

Buy for the practice you will actually have

It can be tempting to choose the most dramatic-looking flute or the lowest note you hear in a video. Instead, picture where the instrument will sit in your life. Will you play for ten quiet minutes before work? Carry it to a beach, bush retreat or yoga class? Layer it with a handpan at home? Use it in one-to-one wellbeing sessions?

For regular solo practice, comfort and an easy response will matter every day. For group sound work, a lower key and switchable drone may offer the enveloping presence you want. For travel, a smaller mid-to-high flute may be the more faithful companion. And for performers, reliable tuning, projection and the ability to turn the drone on or off can be more useful than decorative detail.

At Handpans Australia, we believe choosing a flute is part of your musical relationship with the instrument, not simply a list of specifications. Explore our drone flute collection & triple drone flute collection to compare available keys, woods and designs and find an instrument that suits the way you want to play.

Give yourself permission to choose the flute that feels like a beginning rather than a final destination. The right instrument is the one that keeps drawing you back – one quiet note, one steady drone and one unhurried melody at a time.

Native Flute Posture Tips for Open, Easy Playing

Native Flute Posture Tips for Open, Easy Playing

Native Flute Posture Tips for Open, Easy Playing

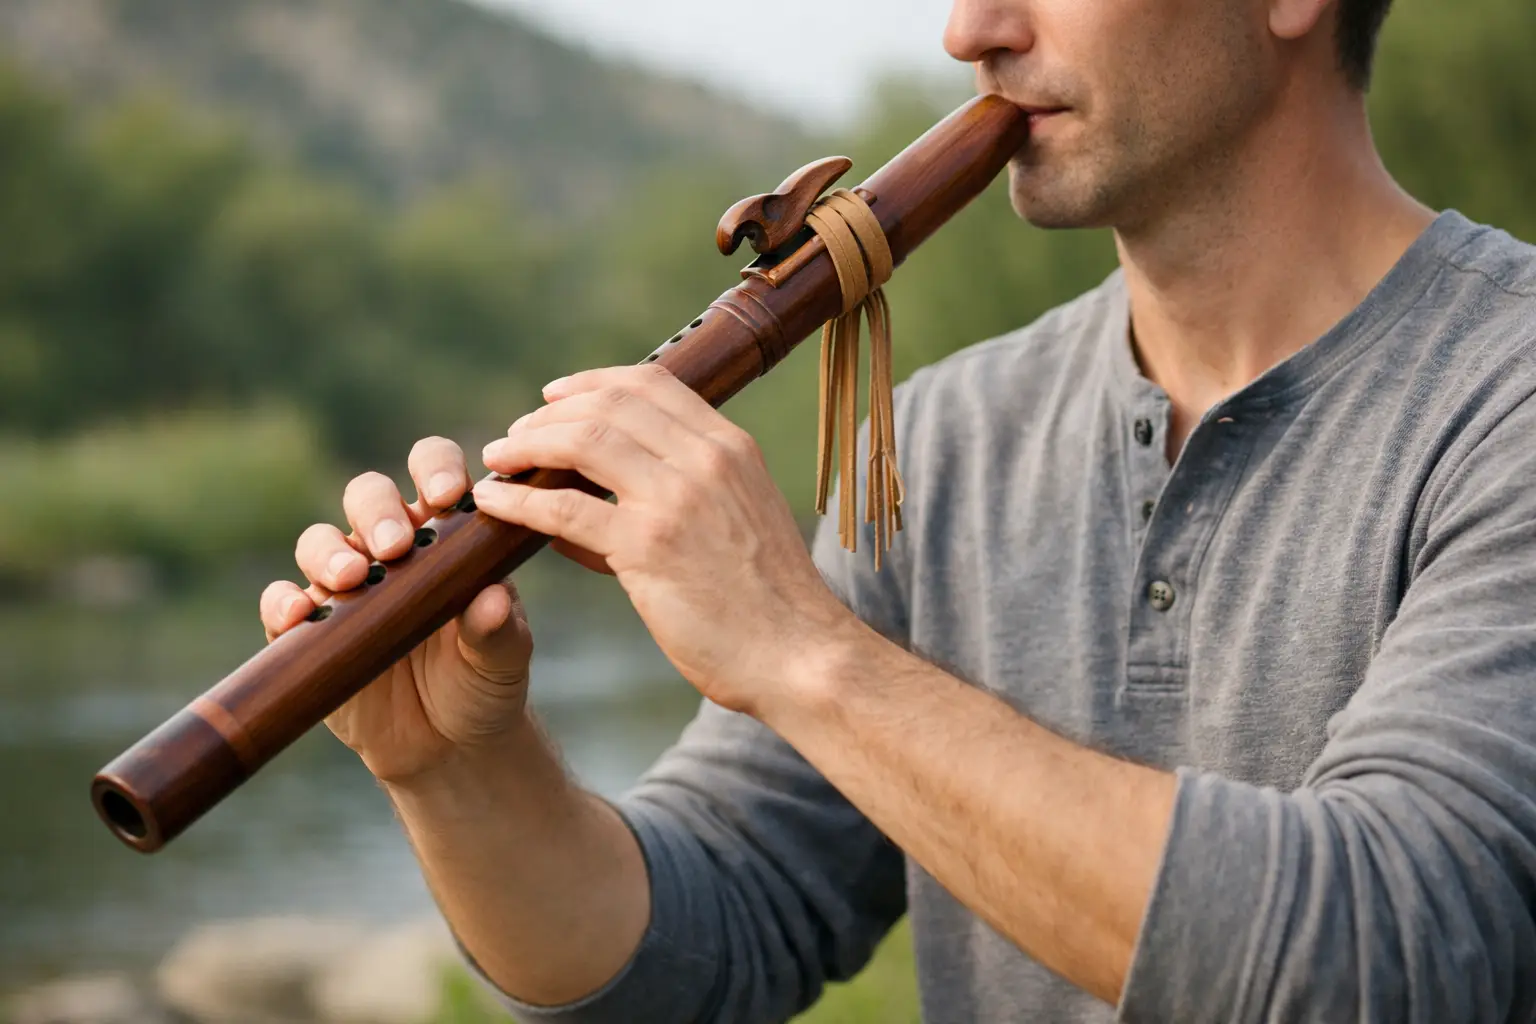
A Native American flute can make a gentle, singing sound with surprisingly little effort, but only when your body has room to breathe with it. These native flute posture tips are not about holding yourself rigidly still. They are about finding a balanced, comfortable position so your breath, hands and attention can settle into the music.

For many players, this instrument becomes part of a quiet morning ritual, a sound healing session, a walk beside the water, or an intimate performance. In each setting, good posture helps the flute feel like an extension of your body rather than something you have to wrestle into tune.

Begin with balance, not stiffness

Whether you play seated or standing, let your feet create a stable base. When standing, place them about hip-width apart, with your knees soft rather than locked. Let your weight rest evenly through both feet. You do not need a formal stage stance – just enough grounding that your upper body can remain free.

When sitting, choose a chair that allows both feet to meet the floor. Perching on the front half of the seat often works well because it keeps the pelvis neutral and the spine naturally long. A deep lounge chair may be perfect for listening, but it tends to round the lower back and compress the breath needed for playing.

Think of length through the spine rather than pulling your shoulders backwards. If you try to “sit up straight” by tightening your chest, your neck and jaw may follow. Instead, allow the crown of your head to float upwards while your ribs stay soft. It is a quieter adjustment, but it gives your breath more space.

Hold the flute at a natural angle

Bring the flute to you. This simple idea prevents one of the most common habits among beginners: lowering the head and reaching down towards the instrument. When your chin tips towards your chest, the throat can narrow and the shoulders soon become tense.

Raise the flute until the mouthpiece meets your lips comfortably. For most players, the instrument will angle slightly downwards from the mouth rather than sitting perfectly horizontal. The exact angle depends on your height, arm length, flute size and whether you are seated or standing. There is no prize for copying another player’s position exactly.

Your head should feel balanced over your neck, with the gaze generally forward or slightly down. If you need to crane your neck to see your fingers, pause and check the flute’s angle instead. With time, your hands will learn the hole positions by feel, freeing you to listen rather than constantly look.

Let the shoulders fall

A raised shoulder is often a sign that the flute is being supported by tension instead of balance. Before you play, breathe in gently, then let the shoulders drop as you breathe out. Notice whether one shoulder lifts higher, particularly the arm supporting the lower end of the flute.

The elbows do not need to hug your sides, nor should they flare out dramatically. Let them hang in a loose, useful middle position. This creates enough room for the wrists to stay neutral and for your fingers to move quietly across the holes.

Keep your wrists soft and your fingers curved

Clear notes rely on properly covered finger holes, yet pressing hard is rarely the answer. Shape each finger with a relaxed curve, then place the soft pads over the holes. Imagine resting your fingers on still water rather than pushing buttons.

Avoid bending the wrists sharply inwards or upwards. A straight, easy line from forearm through wrist to hand helps reduce fatigue, particularly during longer meditative playing or repeated practice sessions. If your wrists ache, it may mean the flute is too far from your body, too low, or angled in a way that forces the hands to compensate.

Keep the thumbs relaxed as well. They provide support, but they should not clamp the flute. A tight grip can make finger movement slow and may create an unsteady tone as you shift between notes.

For players with smaller hands, arthritis, previous injuries or limited mobility, comfort matters more than a textbook hand shape. Try playing while seated, using a slightly different flute angle, or taking shorter sessions with breaks. A well-matched flute size also makes a significant difference. The right instrument should invite exploration, not leave your hands strained after ten minutes.

Make room for an unhurried breath

The Native American flute generally responds best to a calm, steady stream of air. Posture supports this by leaving the belly, ribs and chest free to expand naturally. You do not need to force a huge breath or inflate your chest. Forced breathing can make the sound airy, sharp or unstable.

Try this before playing a first note. Rest the flute in position, soften your jaw, and breathe in low and quietly. As you breathe out, begin the note with a gentle stream of air. Let the sound arrive rather than attacking it.

If the tone keeps breaking, check your body before blaming your breath. Are you leaning forwards? Is your jaw clenched? Have your shoulders crept up? Are you holding your stomach tightly? Often, a small reset creates a more centred tone than simply blowing harder.

Leave space between phrases

Players who come to the flute through meditation, yoga or sound-based wellbeing often have a natural feel for space. Let that instinct guide your phrasing. A pause is not empty time or a mistake to be filled. It gives your hands a chance to release, your body a chance to reset, and the previous note a moment to fade.

This is especially useful when improvising. Rather than trying to keep a continuous stream of notes going, play a short phrase, breathe, and listen. The next phrase often becomes clearer when you allow your posture and breath to settle first.

Seated versus standing: choose for the moment

Seated playing is ideal for slow practice, reflective sessions and learning new finger patterns. It can feel grounded and helps many beginners notice unnecessary tension. Keep the feet planted and avoid curling around the flute, particularly if you are sitting on the edge of a bed or couch.

Standing can bring more freedom to the breath and makes it easier to connect with an audience or move with the rhythm. It is useful for performance, outdoor playing and sound journeys where you may be walking around a space. The trade-off is that players sometimes sway or shift their weight without noticing, which can make the flute angle inconsistent.

Neither position is better in every circumstance. Use seated practice to build awareness, then spend time standing once your hands know the flute more confidently. Your posture should serve the music you are making, not become another rule to manage.

A simple body check before you play

Take ten seconds before each session to notice four things: your feet are supported, your spine is comfortably long, your shoulders are low, and your wrists are easy. Then bring the flute up, rather than lowering yourself down to it.

Check again after a few minutes. Tension is not always present at the beginning of a session. It can appear when you are concentrating on a new melody, reaching for higher notes, or trying to play quietly. Brief check-ins help you catch it before it becomes soreness.

Respect the instrument’s voice and your own body

The Native American flute carries a rich cultural history, and playing it with care includes listening closely to its voice rather than trying to overpower it. A relaxed posture supports that kind of listening. It allows the breath to be gentle, the notes to be intentional, and the silences to feel as musical as the sound.

If you’re looking for an instrument that feels comfortable in your hands from the beginning, explore our Native American style flutes and compare the available sizes, keys and designs. Choosing a flute that suits your reach and playing position can make a meaningful difference to how naturally your posture develops

Over time, the best posture will become less visible. Your hands will find their places, your breath will move more freely, and the flute will rest in your body with quiet familiarity. Let comfort be your guide. When you feel at ease, there is more room for the warm, personal resonance that makes each phrase your own.

Handpan Sound Healing for Calm and Connection

Handpan Sound Healing for Calm and Connection

Handpan Sound Healing for Calm and Connection

A handpan does not ask you to arrive with perfect timing, a repertoire of songs or years of music lessons. Rest it on your lap, let your hands find the steel, and a small pattern can become a spacious field of sound. That accessibility is one reason handpan sound healing has found a natural place in meditation rooms, yoga studios, private rituals and creative practice across Australia.

The appeal is not simply that the handpan sounds beautiful. Its notes are arranged to work together, inviting melody and rhythm to emerge without the pressure of getting everything technically right. For many players and listeners, that creates a gentler way to meet the moment: through resonance, repetition, silence and attentive listening.

What handpan sound healing can offer

Sound healing is a broad term. In wellness settings, it often describes the intentional use of sound to support relaxation, reflection, meditation or a sense of connection. A handpan can be part of that experience because its warm sustain and rounded attack feel less abrupt than many percussion instruments. Notes bloom, overlap and fade gradually, leaving room for the breath.

That said, a handpan is not a medical treatment, and it should not be presented as a substitute for professional health care or mental health support. Its value lies in the experience it can help create. A slow, considered handpan session may support a calming routine, give a group a musical focal point or offer a player a constructive way to process a busy day.

For some people, the effect is immediate: the first low note seems to settle the room. For others, it is the act of playing that matters most. The hands become occupied, the ears stay alert, and attention shifts away from the stream of thoughts competing for space. Neither response is more valid. Sound-based wellbeing is personal, and context matters.

Why the handpan feels so immersive

A handpan is a tuned steel instrument played with the hands and fingers. At its centre sits the ding, often the lowest and most grounding note. Around it are tone fields tuned to a particular scale. Because these notes have been selected to sit harmoniously together, a beginner can explore freely while still creating a coherent musical atmosphere.

This layout changes the relationship many people have with music-making. Rather than reading notation or worrying about a wrong chord, you can start by answering one note with another. A simple pulse on the ding can become an anchor. A higher note can offer lift. A pause can be as expressive as a phrase.

The handpan’s physical response is part of its character too. Gentle touch produces a clear, resonant voice; heavier strikes can choke the sound or introduce unwanted clatter. Learning to play softly is not a limitation. It is an invitation to listen closely. Over time, players discover that subtle changes in touch, placement and timing create far more colour than force ever could.

Resonance needs space

The most restorative handpan music is not always the slowest or quietest. It is music with room to breathe. When every moment is filled with notes, the natural decay of the instrument disappears. When phrases are allowed to settle, listeners can feel the shape of the sound and the silence around it.

This is useful whether you are playing alone or holding space for others. A meditative session may use sparse patterns and long pauses, while a yoga class might benefit from a steady, unobtrusive rhythm. A live performance can gradually build more movement and contrast. The intention should guide the playing, rather than a fixed idea of what healing music must sound like.

How to begin a handpan sound healing practice

Start with a short ritual you can return to. Place the handpan somewhere comfortable and stable, ideally on your lap or a purpose-made stand. Before playing, sit quietly for a few breaths and notice the acoustic character of the room. A tiled space will reflect sound differently from a carpeted lounge room, and an outdoor setting brings wind, birds and distant traffic into the experience.

Begin with the ding. Play it softly, then wait until the sound has nearly faded. Repeat this several times at a pace that feels unhurried. Next, add one nearby tone field after every second or third ding. You are not trying to impress anyone. You are establishing a pulse you can comfortably maintain.

Once that feels settled, create a question-and-answer phrase. Play two or three notes in the lower area of the handpan, pause, then respond with two notes higher up. Keep the phrase simple enough that you can hear how each note blends. If your attention wanders, return to the ding and begin again.

A useful practice might look like this over ten minutes: spend the first few minutes with slow single notes, move into a gentle repeating pattern, then gradually reduce the number of notes until you finish with silence. There is no need to force an emotional outcome. Let the instrument be a companion to whatever is already present.

Choosing a scale for calm, reflection or movement

No scale can guarantee a particular feeling. Musical associations are shaped by culture, memory and personal taste. Still, the scale of a handpan has a strong influence on the atmosphere it naturally encourages.

Minor scales are often chosen for introspection, depth and a more contemplative mood. They can feel earthy and cinematic, particularly when played slowly. Major scales tend to sound brighter and more open, which may suit uplifting morning practice, group sessions or music that needs a sense of warmth and possibility.

Some players are drawn to scales with an Eastern, Celtic or mystical flavour. These can be wonderfully expressive, but it is worth listening beyond the label. Ask yourself whether you would enjoy returning to those notes on an ordinary Tuesday night, not only during a special meditation. The right handpan is one that keeps calling you back to play.

The number of notes matters as well. A handpan with fewer notes can feel focused and uncluttered, making it approachable for beginners and spacious wellness work. More notes offer a larger melodic range and greater possibilities for experienced players, but can take longer to learn intuitively. There is no universal best choice – only the balance that suits your ears, hands and intentions.

Playing for others with care

Offering handpan music in a yoga class, meditation circle or one-to-one wellbeing setting requires more than beautiful notes. It calls for awareness of volume, timing and consent. Some people find sustained sound deeply settling, while others may be sensitive to volume, repetition or close proximity.

Keep the volume modest, especially indoors. The handpan carries more easily than it may seem from behind the instrument. Position yourself so participants can hear the music without feeling surrounded by it, and leave generous gaps between phrases. If you are playing during guided meditation, let the spoken guidance remain clear rather than competing with it.

It also helps to be precise about what you offer. You can say that the session is designed to support relaxation, presence or creative reflection. Avoid promising to heal conditions, release trauma or create a specific emotional result. A respectful approach protects participants and honours the real, quieter power of music.

For group work, repetition is your ally. A simple pulse gives listeners something to settle into, while small melodic changes keep the sound alive. Save more intricate playing for moments where it serves the room, not just the player. The most moving choice may be to stop completely and let a breath, a bird call or the soft hush of the space take over.

Caring for the instrument and the practice

A handpan is made for touch, but it deserves thoughtful care. Keep it dry, wipe away fingerprints after playing and store it in a quality case when travelling. Avoid leaving it in a hot car, near salt air for extended periods or in damp conditions. These habits help preserve both the finish and the clear resonance that makes the instrument so engaging.

Care also means keeping your practice honest. Some days you may play for twenty minutes and find a flowing, centred rhythm. Other days, a few scattered notes may be all that arrives. Both are part of learning. The handpan is not there to demand a performance from you. It offers a responsive surface for attention, curiosity and expression.

Whether it becomes part of your personal wind-down, a yoga offering or your own musical voice, let the relationship develop slowly. One well-listened note can be enough to begin.

1 2 3 4 5
0